SOP — Depalletiser Operation
FUERST WIACEK Version 1.3 | Packaging — canning line | Frequency: per canning run
Purpose
This SOP covers the operation of the depalletiser on the canning line, including starting and stopping, pallet changes, can size changes, and troubleshooting common issues.
PPE Required
- Ear protection
- Safety goggles
- Steel-toe boots
Risks
| Hazard | Risk |
|---|---|
| Pallet jack pulling pallet back | Can crush feet when removing pallet jack — use feet to brace |
| Back guide set to wrong pallet size | Too large: cans fall into depal. Too small: lift crashes into guide causing serious damage. Always set guide correctly before inserting pallet. |
| Cans falling below the lift | Trip or crush hazard — clear before inserting new pallet |
| Lichtschranke (light barrier) on platform | Crossing it stops the depalletiser — stay clear when running |
| Moving pallet down with cans still at push level | Cans fall — ensure layer is empty or pushed back before lowering |
| Door opening while lift is raised | Not possible — door is interlocked. Never attempt to force it open. |
Control Screen Overview
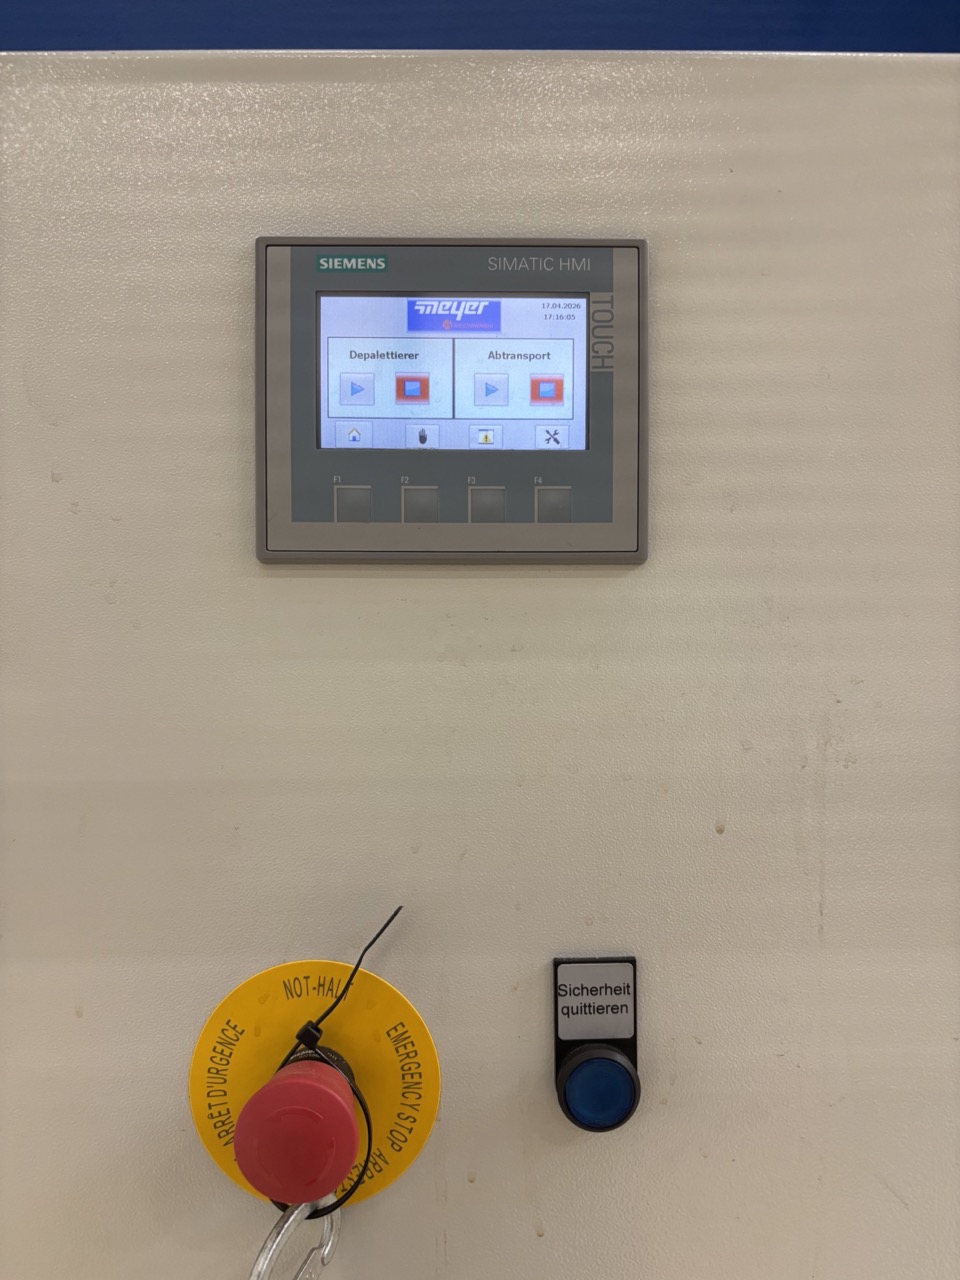
The main screen shows two control panels:
- Left panel — Depalletiser: start and stop the depal unit
- Right panel — Transport: start and stop the transport belt and vacuum devices
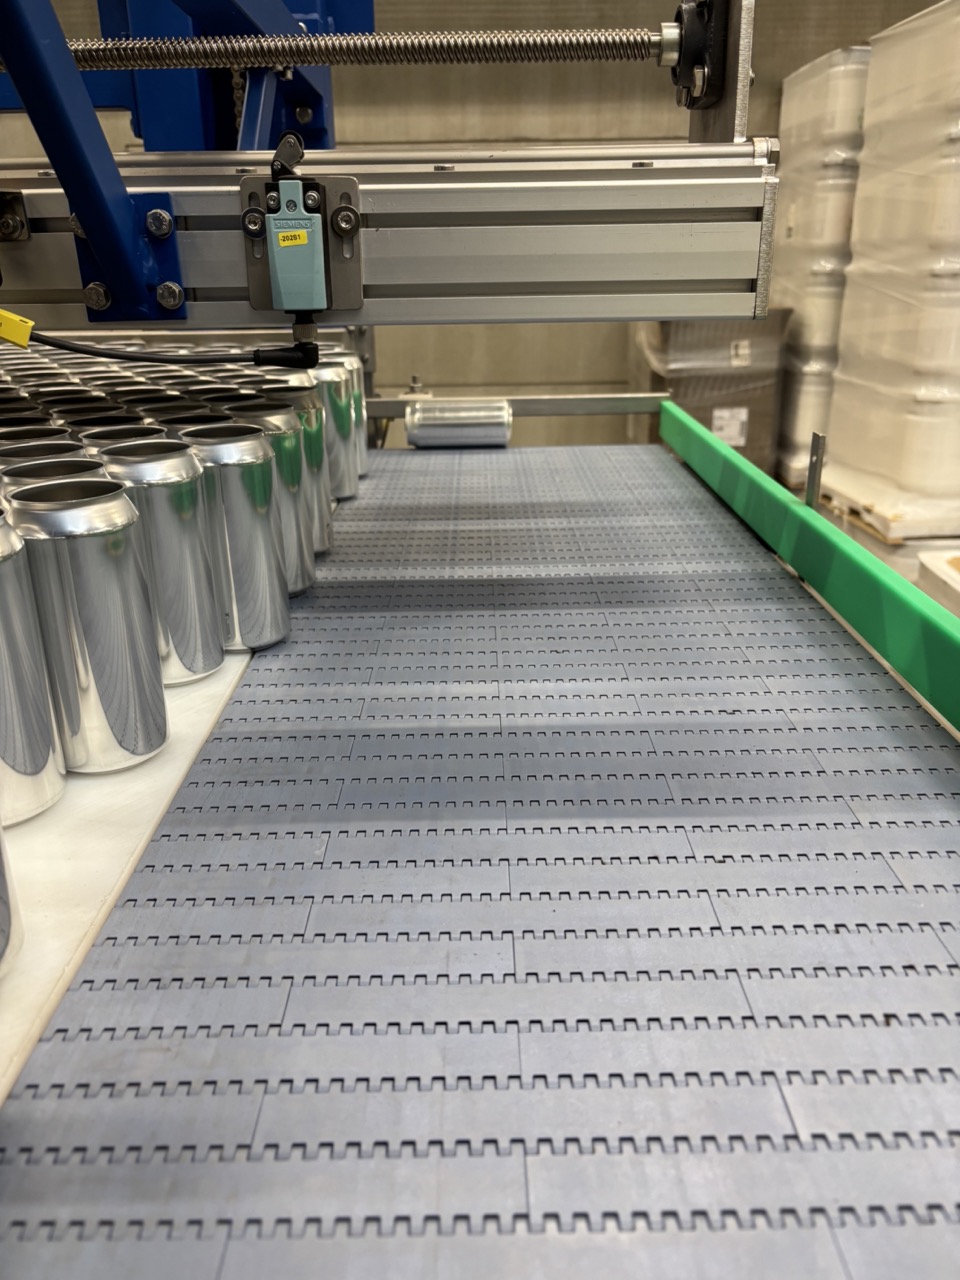
How the Depalletiser Works
The depalletiser pushes each layer of cans off the pallet onto the transport belt. After each layer:
- It takes down the cardboard separator
- It lifts the pallet up one level
- It pushes off the next layer of cans
This repeats until the pallet is empty. The depal then brings the empty pallet back down. Only once the empty pallet is fully lowered can the door be opened. It is not possible to open the door while the lift is in any raised position.
Process
1. Before Starting — Prepare Pallets
Before the canning run begins, prepare the incoming pallets:
- Remove the top frame from each pallet (can be plastic, metal, or wood).
- Stage prepared pallets near the depalletiser so pallet changes during the run are fast.
2. Start the Depalletiser
- Push the pallet into the depalletiser. Confirm it sits firmly against the back wall.
Note
When removing the pallet jack, it can pull the pallet back towards you. Use your feet to brace the pallet as you pull out the jack. Once the jack is out, give the pallet another push with your feet to make sure it sits against the back wall. If unsure, climb up to the platform and check from above.
- Close the door.
- Acknowledge the blinking blue button — usually required twice.
- Press Play. The pallet will rise, remove the first cardboard separator, and begin pushing cans.
3. During the Run
- Monitor the transport belt for jams — see Troubleshooting below.
- Collect cardboard separators as they are dropped by the depalletiser and put them aside.
Warning
Never stop the depalletiser while it is in the middle of removing a cardboard separator. Wait for it to finish — it will drop the cardboard, lift the pallet, and start pushing the next layer. Only stop once that sequence is complete. Stopping mid-task leaves the machine in an undefined state and can cause errors on restart.
4. Same-Size Pallet Change
When the pallet is empty and the depal has lowered it:
- Clear all collected cardboard and put it away.
- Open the door. Pull out the empty pallet by hand — it is easier to handle by hand than with a pallet jack, and you can use it immediately to prop the door open.
- Push in the new pallet (top frame already removed).
- Brace the pallet with your feet as you remove the pallet jack. Give it a final push to confirm it sits against the back wall. Check from the platform if unsure.
- Close the door.
- Acknowledge the blinking blue button (usually twice).
- Press Play.
5. Changing Can Size
If switching to a different can size, additional steps are required. Complete all physical adjustments before changing any settings on the screen.
5a. Empty the Current Layer
Before changing anything, ensure the current pallet layer is empty:
- Press the hand icon to enter Manual mode.
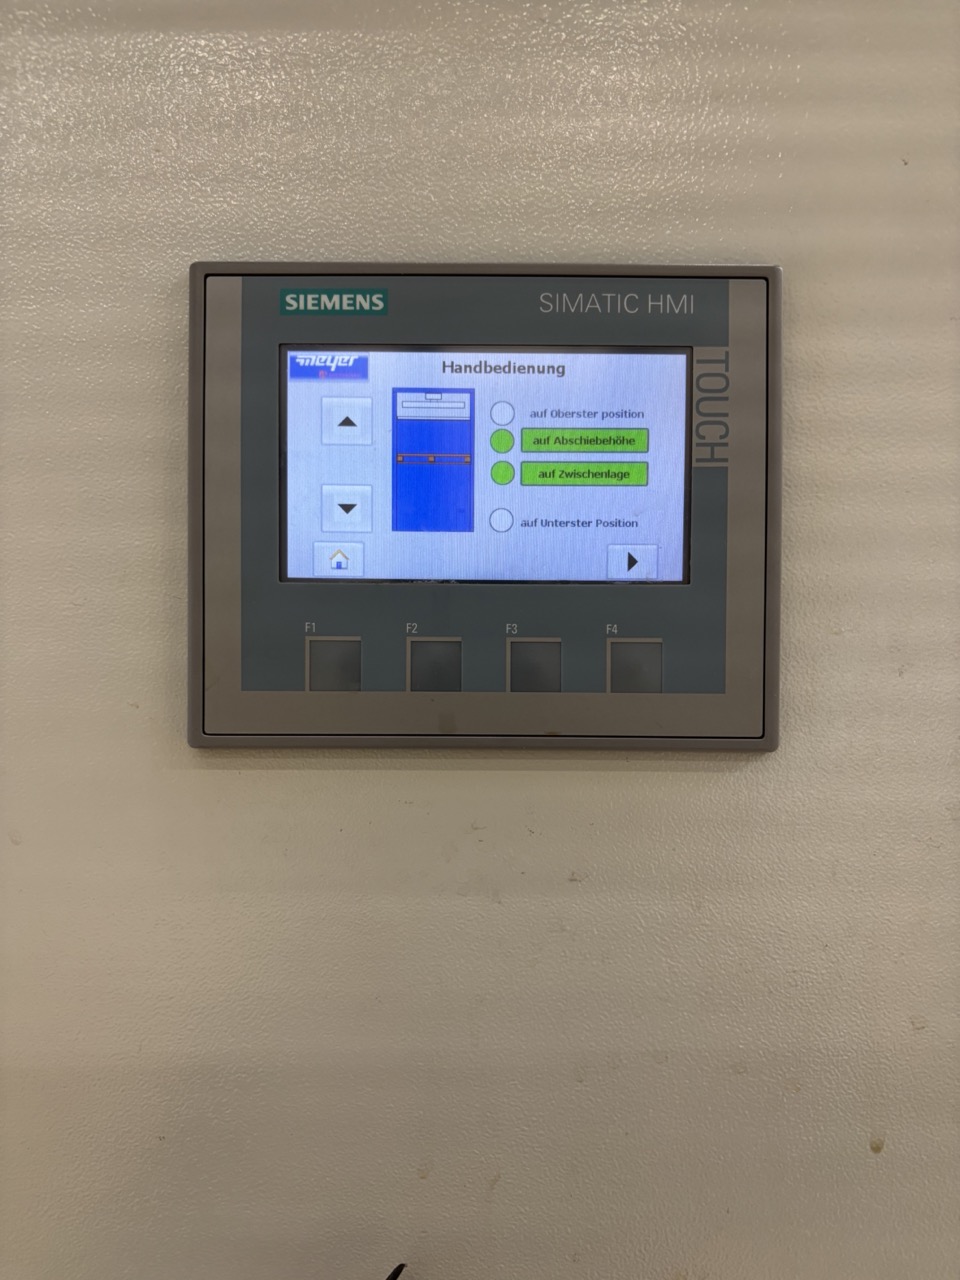
- On the first manual screen you can move the pallet up and down.
Warning
You cannot move the pallet up if the sensor detects cans at push level. When moving the pallet down, make sure the current layer is fully empty first — either push all cans through, or move the pusher to the back and push any remaining cans back onto the pallet by hand. If cans fall below the lift, the depal may not recognise that the pallet is at the bottom, because the cans underneath are lifting the lift slightly.
- Navigate to the next screen in manual mode.
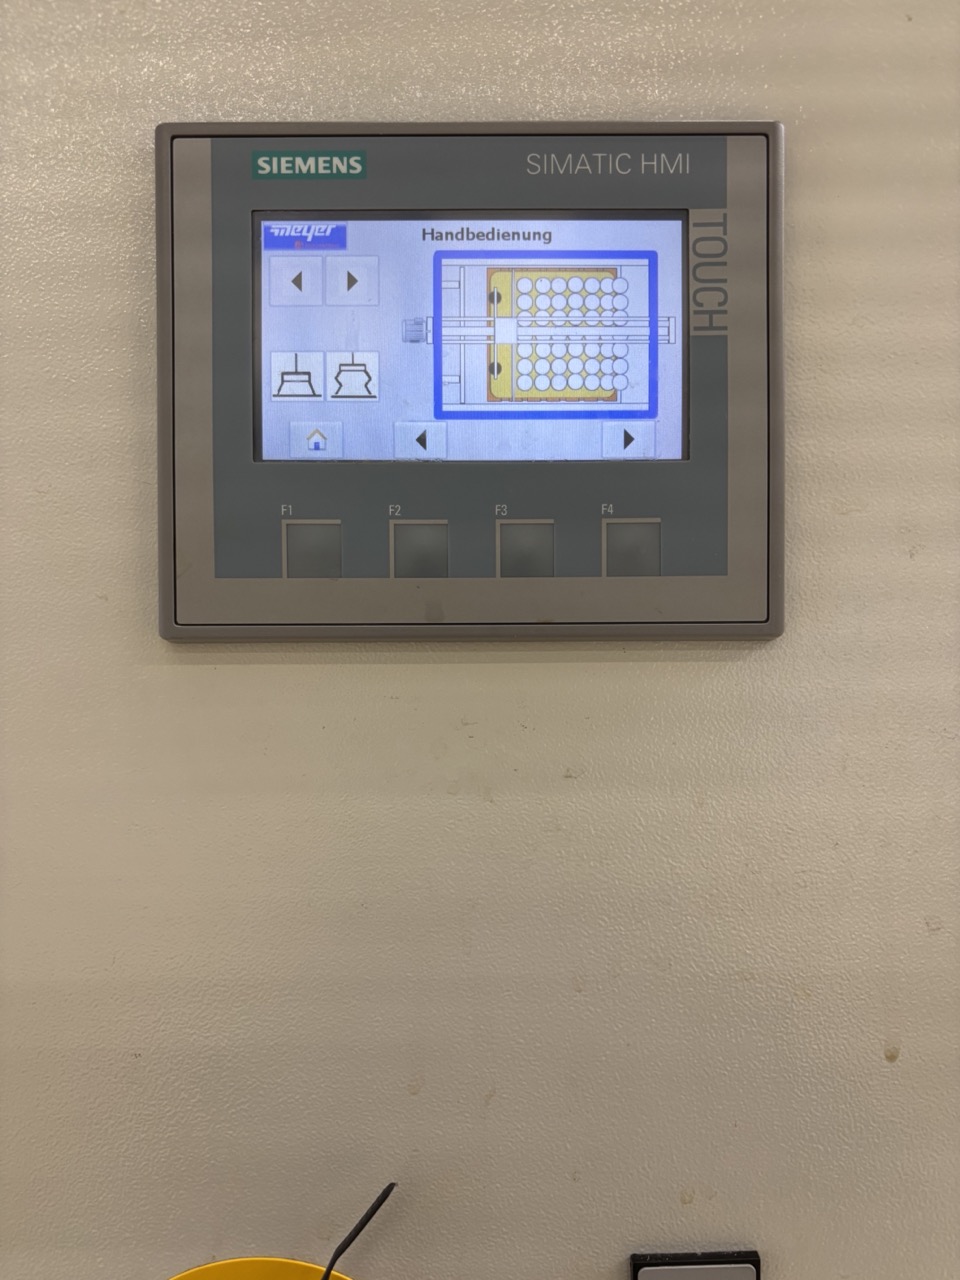
- Here you can move the pusher front (towards the cans) and back (towards the cardboard drop).
- To fully empty the layer, move the pusher to the front in multiple steps, waiting for the transport belt to clear between each move. The depal automatically leaves a few cans on the right side to prevent falls — you can manually push all the way.
Warning
This step is only possible while you are still canning — typically in the last 300–400 cans of the run — and only if you have enough labels and beer remaining to fill those cans through to packaging. If you cannot fill the remaining cans (not enough labels, beer, or time), do not push them forward. Instead move the pusher to the back and push any cans between the pallet and the transport belt back onto the pallet by hand, or collect them into trays and set them aside.
- Once the layer is empty, move the pusher all the way back. The pusher must be fully to the back before you can lower the pallet — the depal will not allow lowering if the pusher is forward, to prevent cans being crushed.
- Return to the up/down screen and lower the pallet.
- You will hear a click when it reaches the bottom. The blue button will blink — leave it for now.
- Open the door and remove the old pallet.
5b. Adjust the Back Guide
Warning
This step is critical. The back guide on top of the depalletiser keeps cans from falling when the cardboard is removed. It also holds the reflector that tells the pusher where the pallet starts. If the guide is set to too large a pallet size when you have a smaller one, cans will fall. If it is set to too small a size when you have a larger pallet, the lift will crash into the guide and cause serious damage.
- Loosen the two handles on the guide.
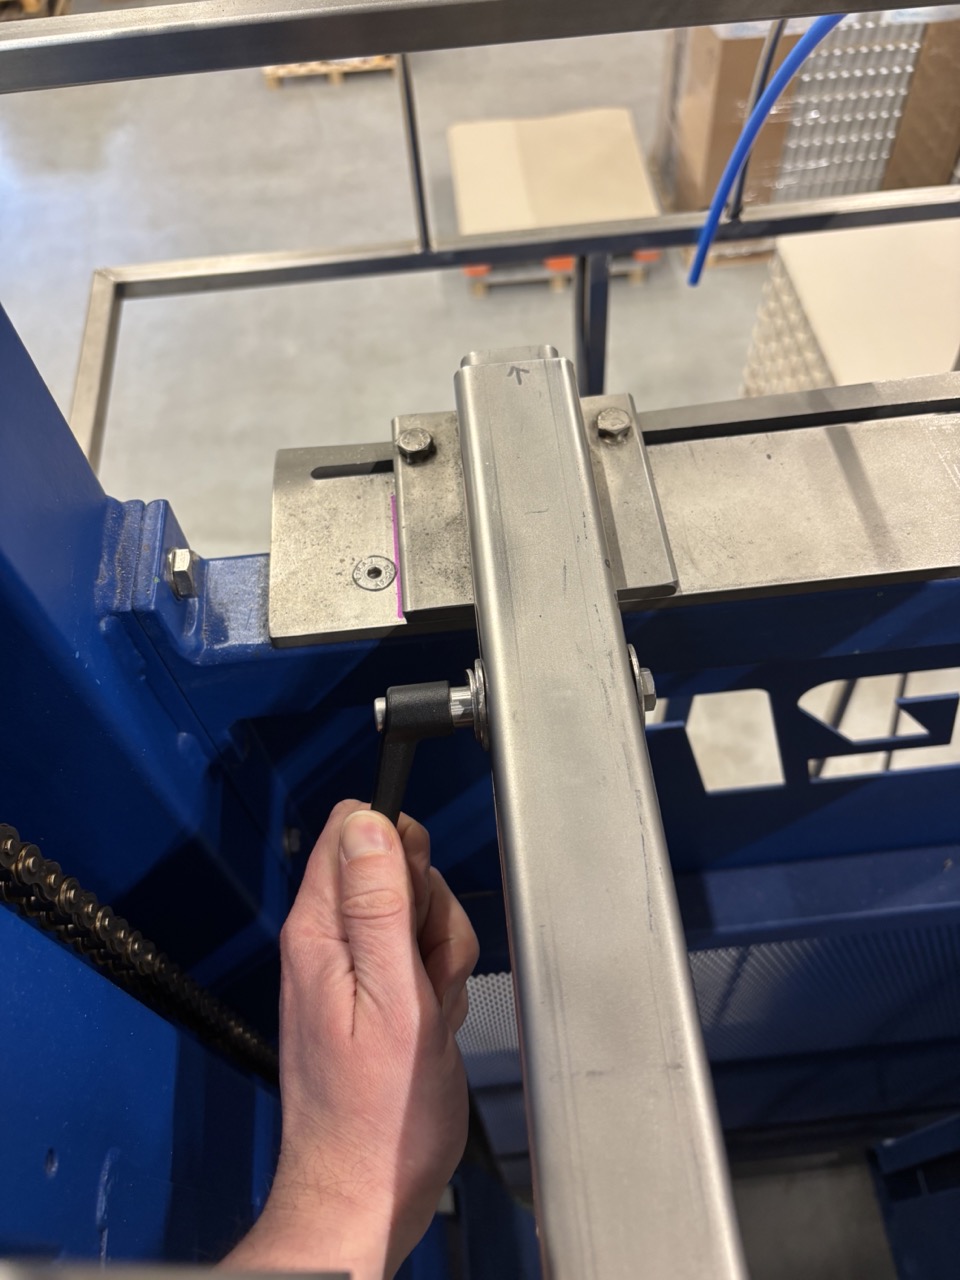
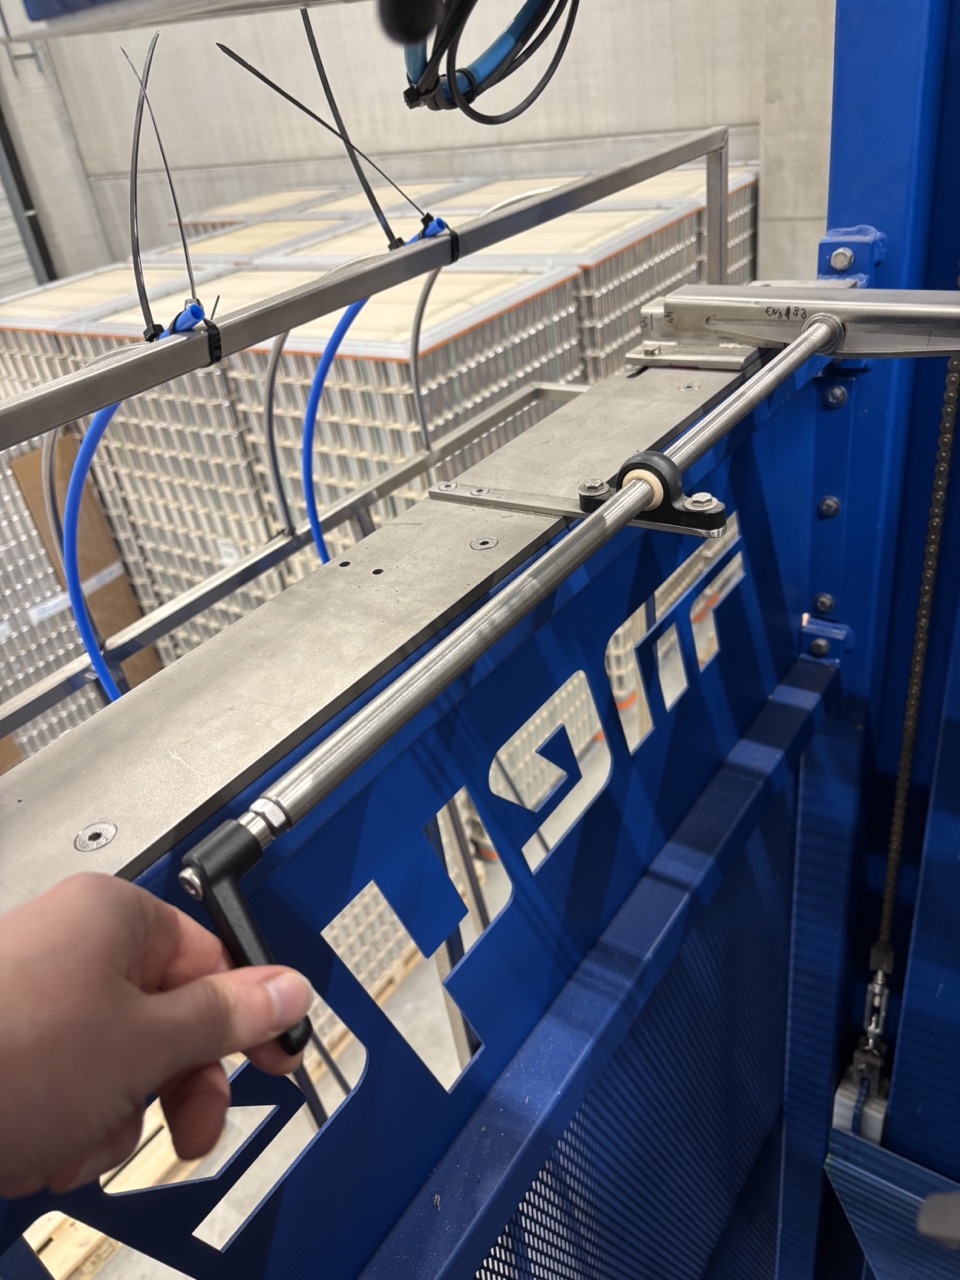
Warning
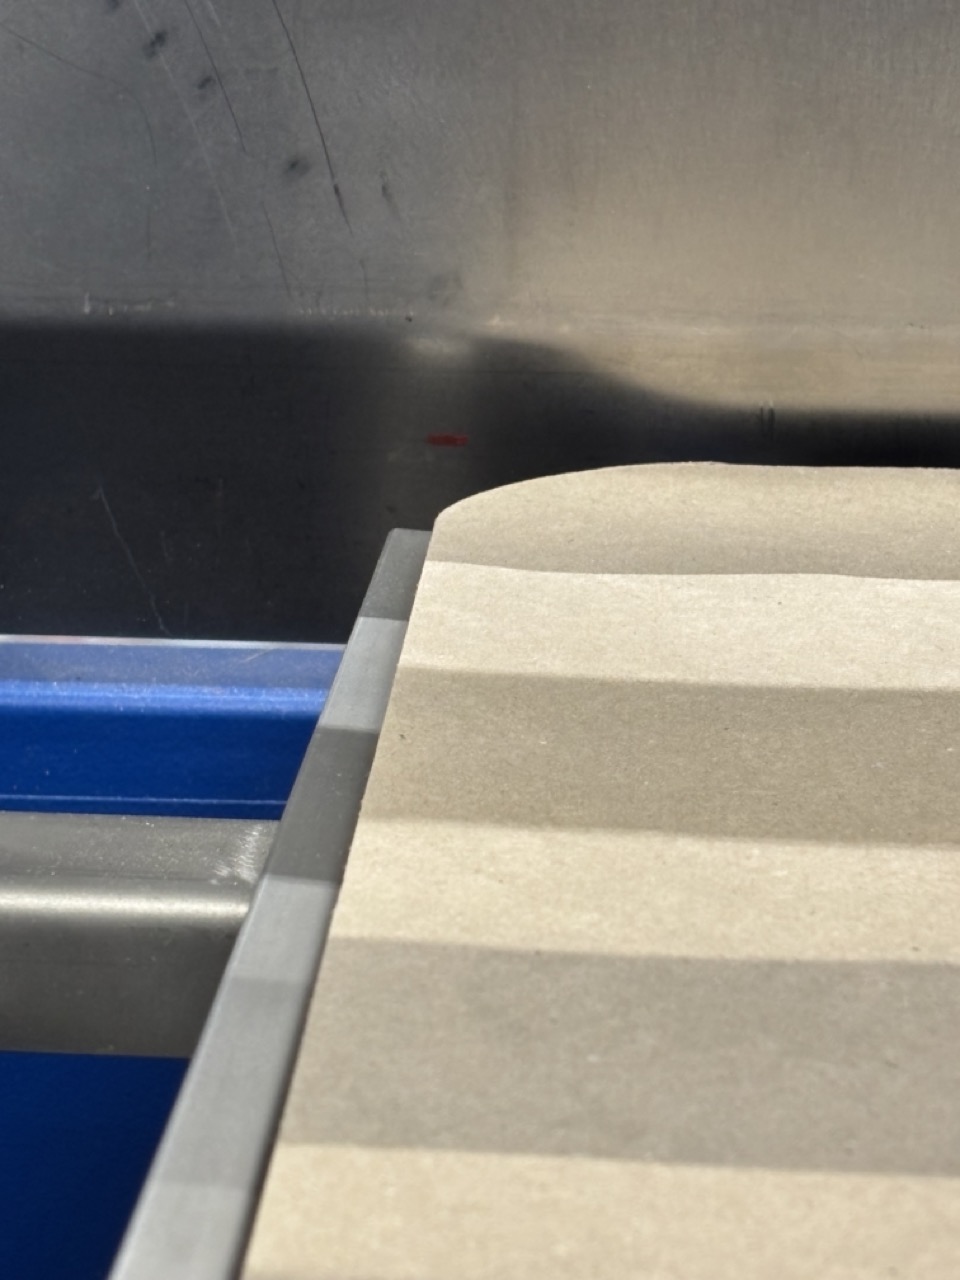
The guide must only move forward and back along the rail — never sideways. The slot in the mounting plate constrains the movement. There are position marks on the stainless steel rail — use these to confirm the guide is aligned correctly and has not shifted to the side.
- Slide the guide to the correct position:
- Large pallet (big format cans): Push the guide towards the back (towards the cardboard drop side) to the mark End 33.
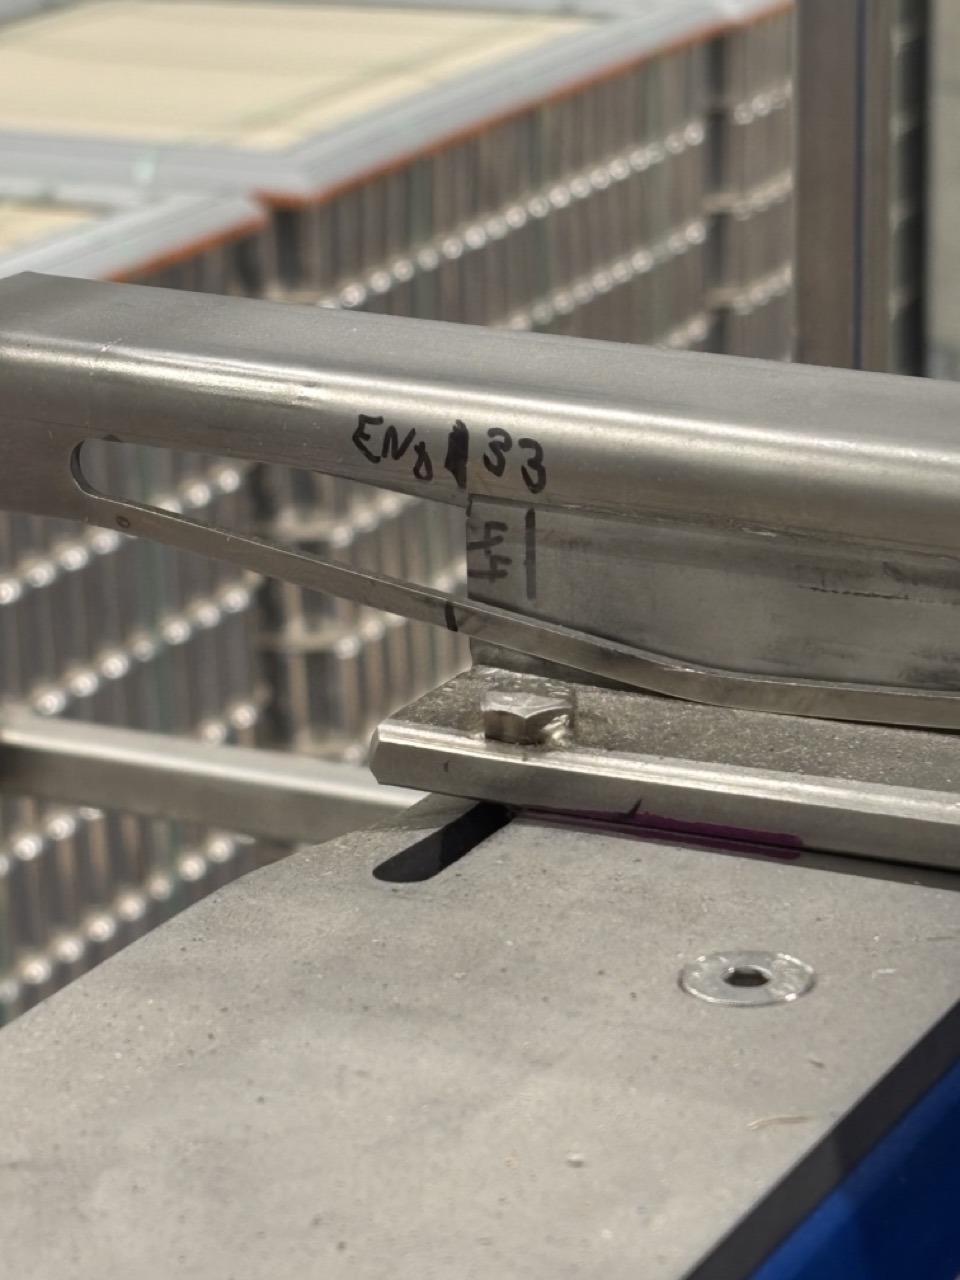
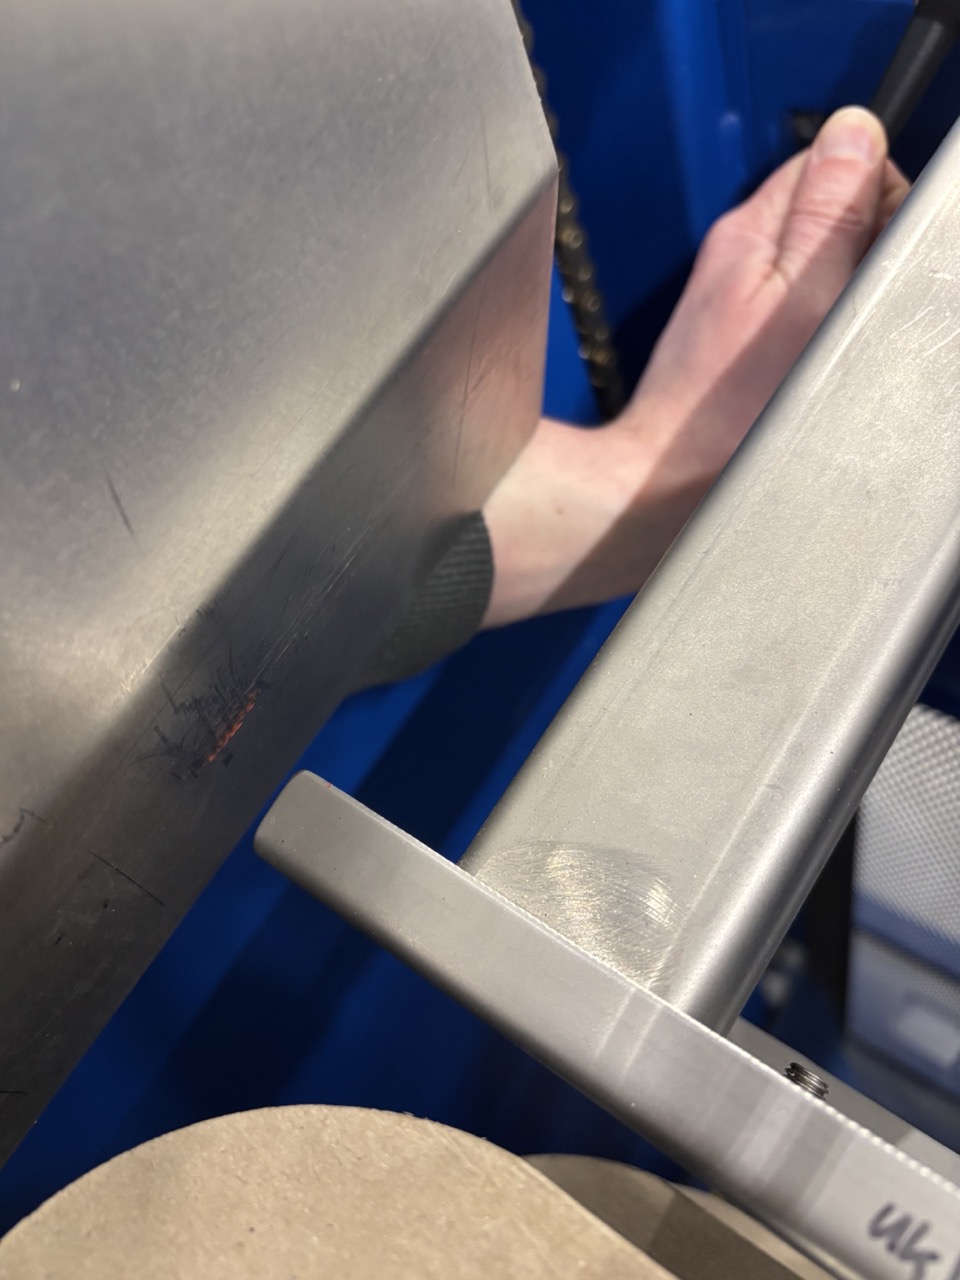
- **Small pallet (440 format):** Push the guide forward to the red marks.
- Tighten both handles securely.
5c. Update Can Size in Settings
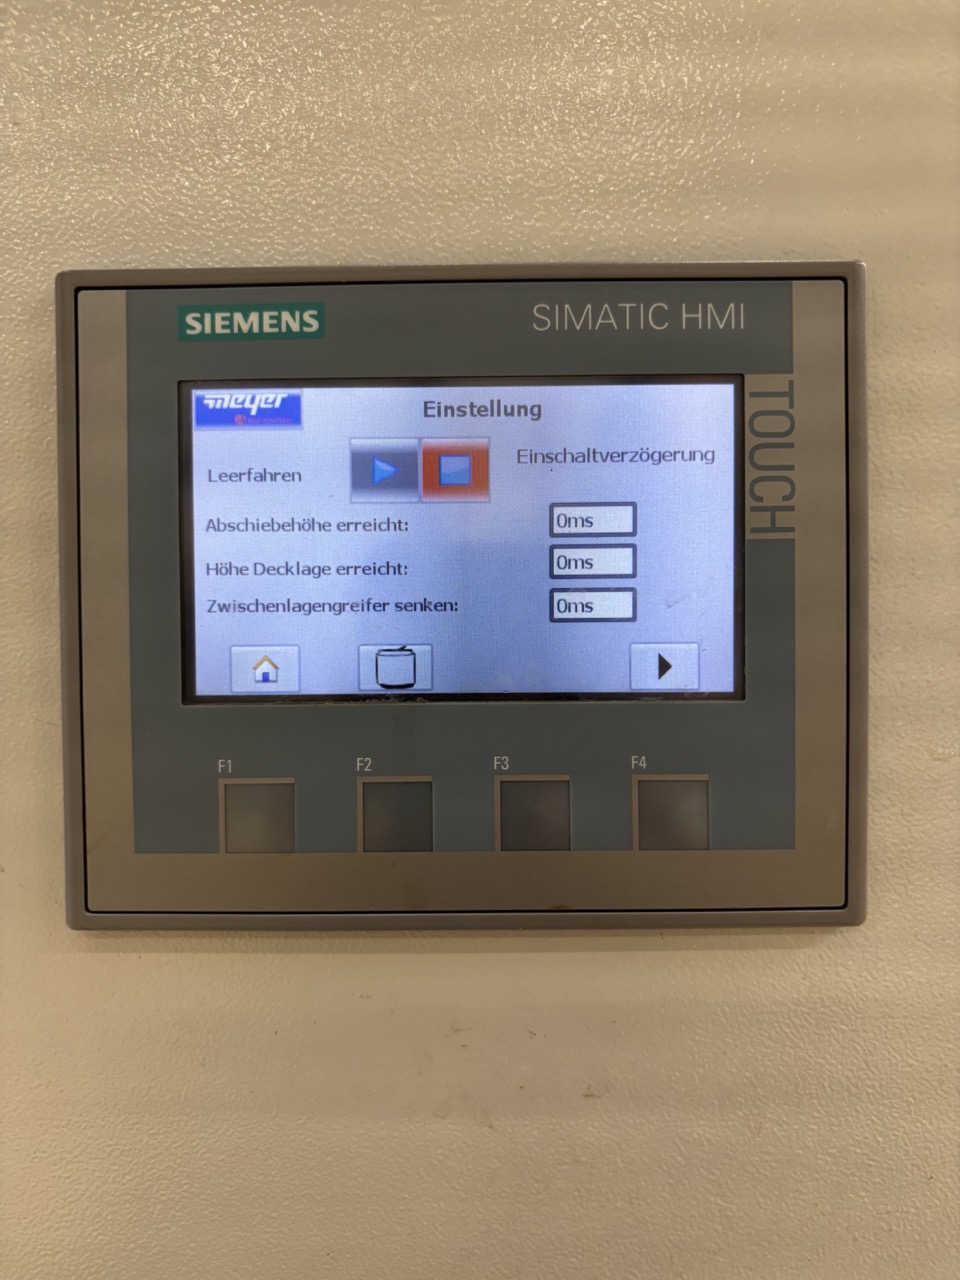
- Press the Settings button on the main screen.
- Press the can icon.
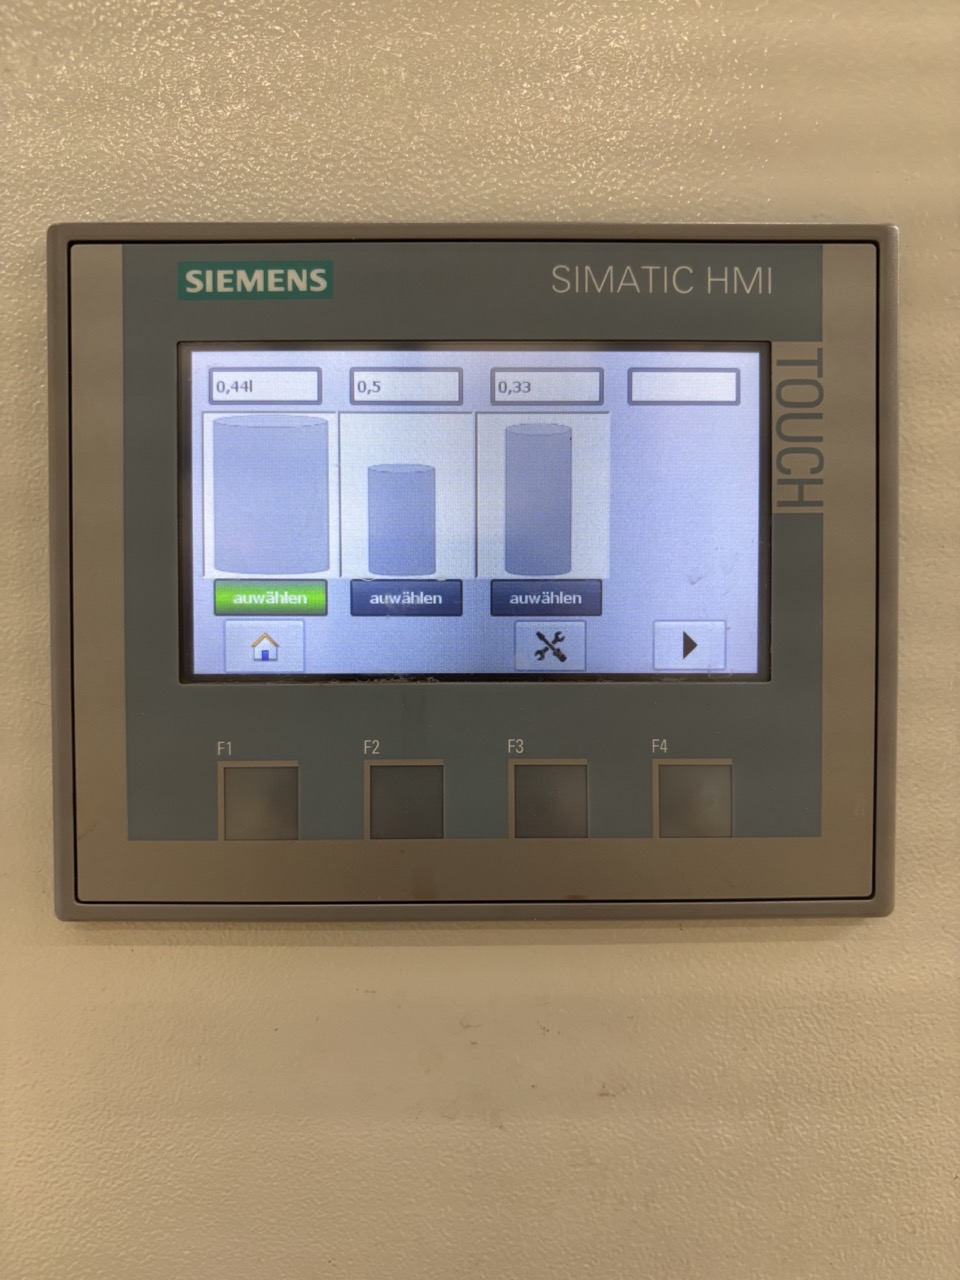
- Select the correct can size. This sets the height the depal lifts the pallet between each layer.
5d. Load New Pallet and Start
- Push in the new pallet (top frame removed, correct size).
- Confirm it sits against the back wall.
- Close the door.
- Remove any remaining cans of the old size from the line — collect in boxes for reuse.
- Acknowledge the blue button and press Play.
Checklist
Before starting
- [ ] Top frame removed from all incoming pallets
- [ ] Pallet pushed in and confirmed against back wall
- [ ] Door closed
- [ ] Blue button acknowledged
- [ ] Play pressed
During run
- [ ] Cardboard separators collected and cleared as they drop
- [ ] Transport belt monitored for jams
- [ ] Depalletiser never stopped mid-cardboard removal
Pallet change (same size)
- [ ] Cardboard cleared
- [ ] Empty pallet removed, door propped open
- [ ] New pallet in, confirmed against back wall
- [ ] Door closed, blue button acknowledged, Play pressed
Can size change
- [ ] Layer emptied — pusher moved to back, pallet lowered
- [ ] Old pallet removed
- [ ] Back guide adjusted to correct position and handles tightened
- [ ] Can size updated in Settings → Can icon
- [ ] New pallet in, confirmed against back wall
- [ ] Old can size removed from line
- [ ] Door closed, blue button acknowledged, Play pressed
Troubleshooting
| Issue | Likely Cause | Action |
|---|---|---|
| Cans stopping on transport belt | A can has fallen horizontal and is blocking the narrow path | Go up to the platform, locate the horizontal can, and stand it upright. The can is still usable. |
| No cans arriving at the filler — belt appears empty | A horizontal can at the back of the belt is covering the reflector sensor | Go to the platform, find and remove the can covering the reflector. See image below. |
| Depalletiser stops unexpectedly | Lichtschranke (light barrier) on platform was crossed | Do not move through the yellow light barrier while the depal is running. Exit the platform carefully and restart. |
| Cans found below the lift inside the depal | Cans fell during operation | Clear all cans below the lift before inserting a new pallet. The lift can be raised by hand but is heavy — get someone to spot you. If cans remain below the lift, the depal may not recognise the pallet is at the bottom. |
| Machine behaves unexpectedly after restart | Depal was stopped mid-task (during cardboard removal) | Check the current state of the pusher and pallet. In Manual mode, move the pusher fully to the back, lower the pallet, and restart from a known state. |
| Lift will not lower | Pusher is not fully to the back | Move pusher fully back before attempting to lower the pallet. |