SOP — Labeller Operation
FUERST WIACEK Version 1.2 | Packaging — label applicator setup and operation | Frequency: per packaging run
Purpose
This SOP covers loading label rolls, setting dates, calibrating label pitch, and operating the pressure-sensitive label applicator on the canning line. Includes troubleshooting for common issues.
Equipment
- Label applicator (labeller)
- Videojet inkjet date printer (mounted on labeller)
- Correct label roll for the beer being packaged
- Tape (for roll splicing)
- Damp sponge (for belt wetting when needed)
1. Before You Start
- Confirm the correct label roll for this beer — check SKU against the brew sheet
- Check the receiver (take-up mandrel that winds spent carrier paper) — if the wound carrier paper is at or past the marker line, empty it before loading
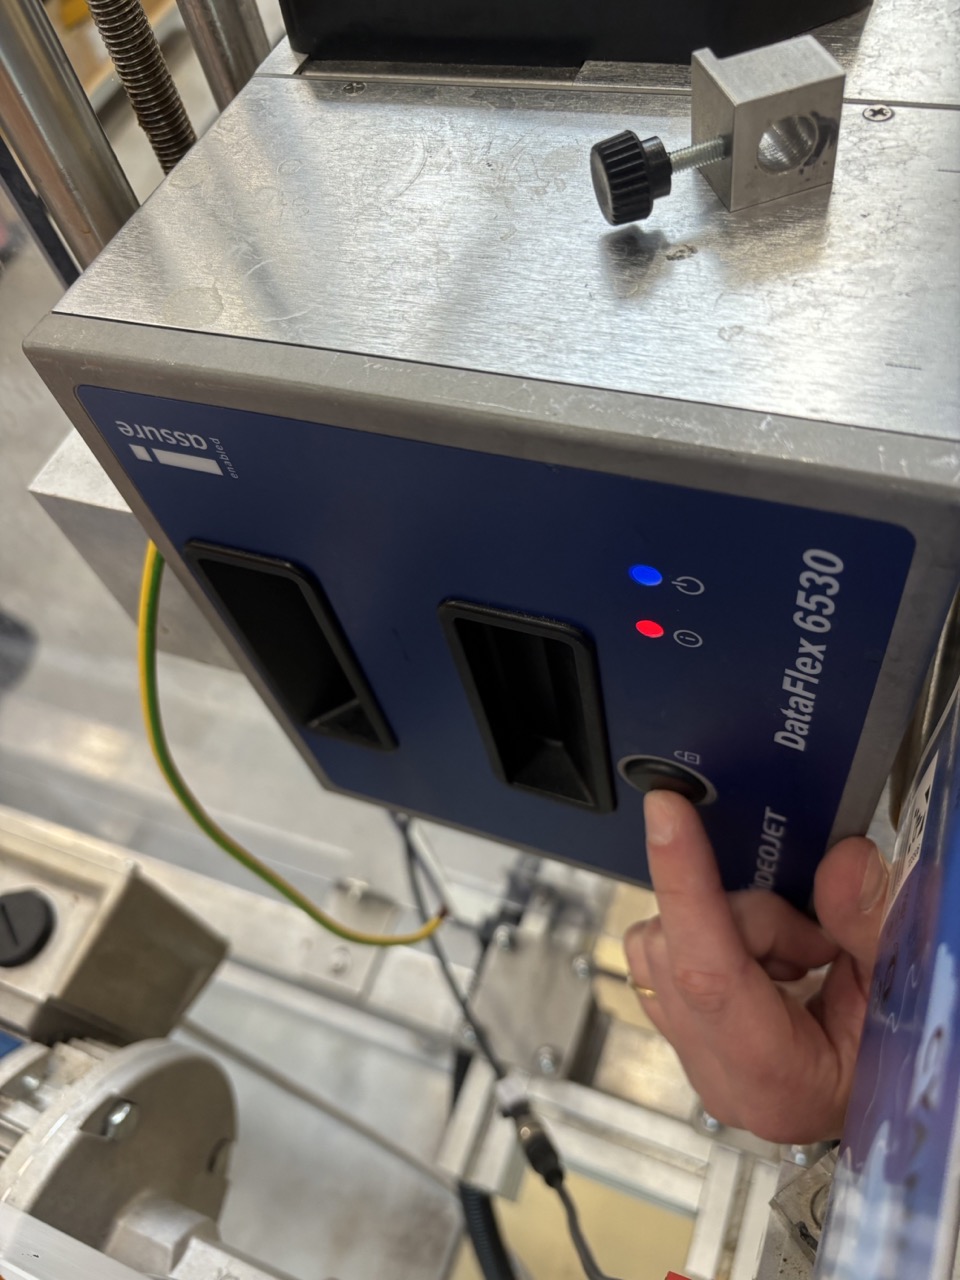
- Confirm Videojet is powered on — green indicator button lit
Note
The inner disc of the receiver rotates with the roll. When it protrudes past the outer casing it creates friction against it, which disrupts label feed. Empty the receiver whenever it approaches the marker line.
To empty the receiver:
- Locate the red marker hook and loosen its screw just enough to allow the pin to move — do not remove the screw.
- Pull the pin out → the mandrel halves come together → lift the carrier paper clear. Discard.
- Press the mandrel back down so the holes align with the screw point — it will click/snap into position.
- Re-tighten the red marker hook screw finger-tight only.
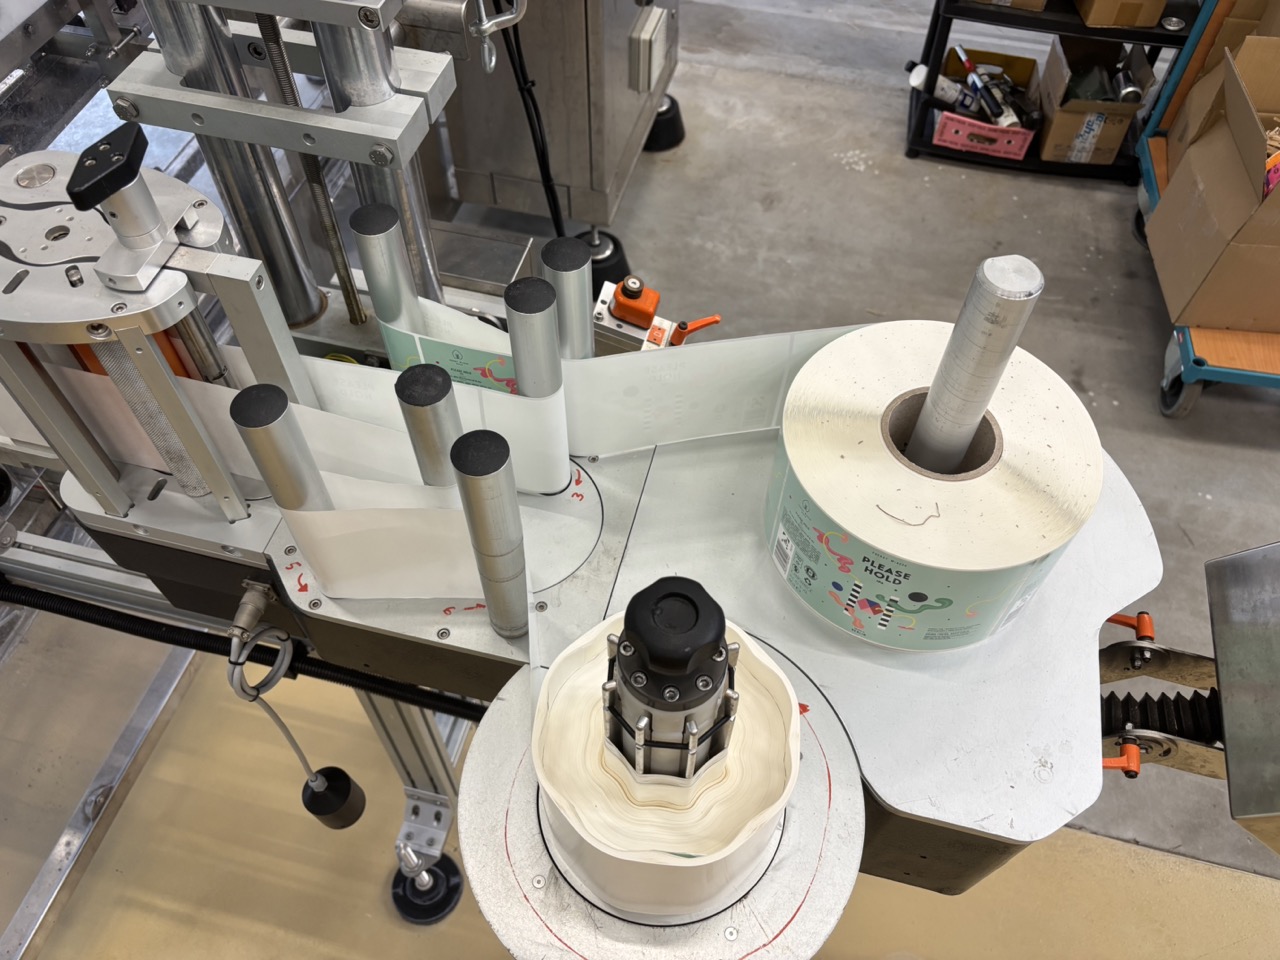
2. Changing the Label Roll
2.1 Remove the old roll
- Turn the labeller off using the side switch — set to 0.
- This releases spring tension from the paper path.
- Remove the old label roll from the supply mandrel.
2.2 Load the new roll
- Place the new label roll on the supply mandrel.
-
Wind the carrier paper along the paper path back to the receiver.
Warning
Never fully re-thread the carrier paper path. The labeller does not need re-threading on a standard roll change — only the roll itself changes. If the path becomes unthreaded, re-thread following the machine markings before continuing.
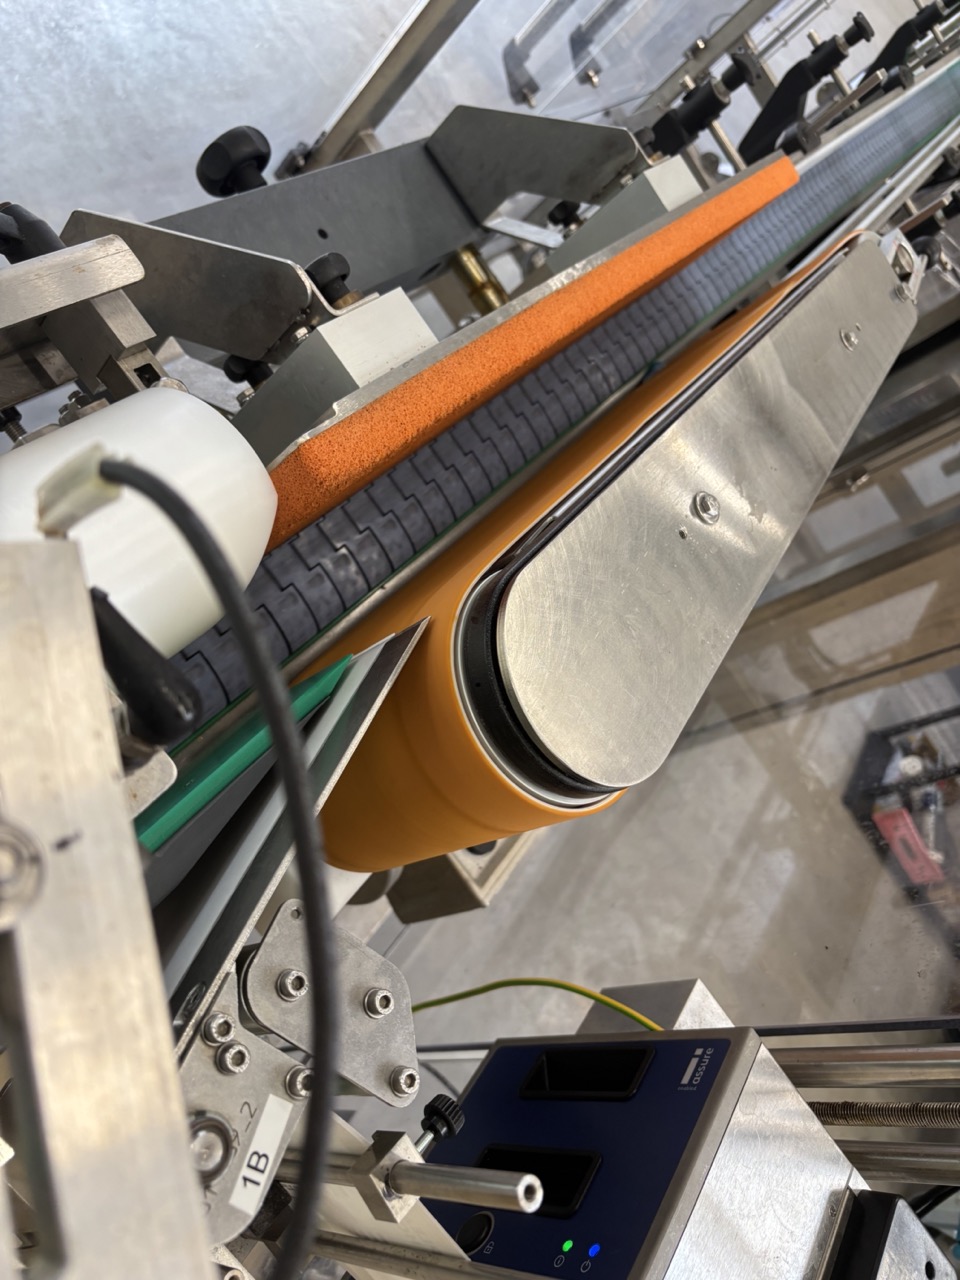
After loading, check the label is correctly seated at the applicator head:
-
The label should protrude approximately 5 mm past the peeling blade — no more. Static causes the label to adhere to the belt, which moves faster than the can; the label wraps around the can at a later contact point. The machine relies heavily on static for application.
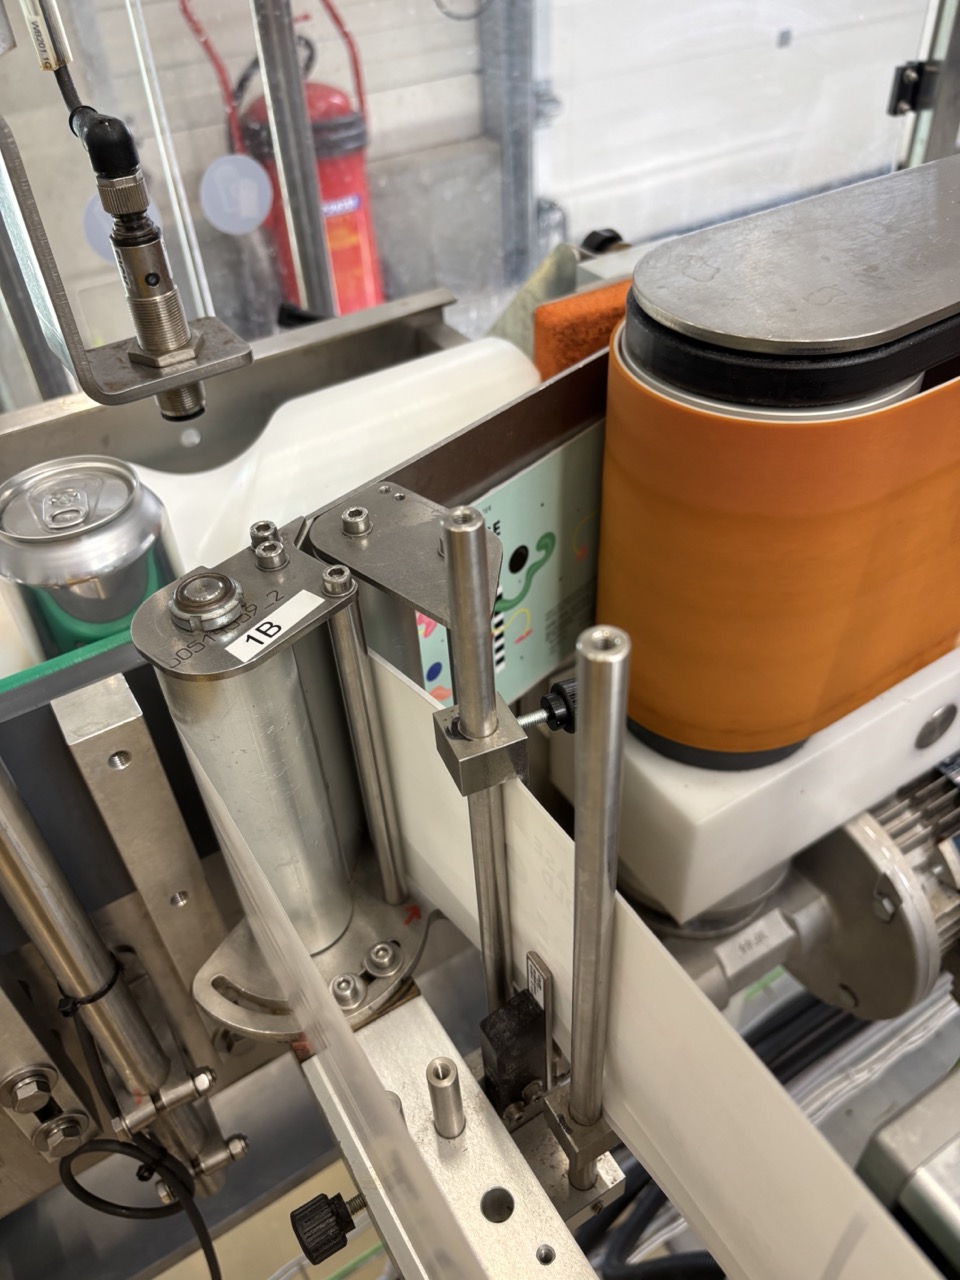
Confirm both guide pins are correctly set:
-
Bottom pin — guides the label from below. The label must run through the sensor adjacent to the pin, seated as shown.
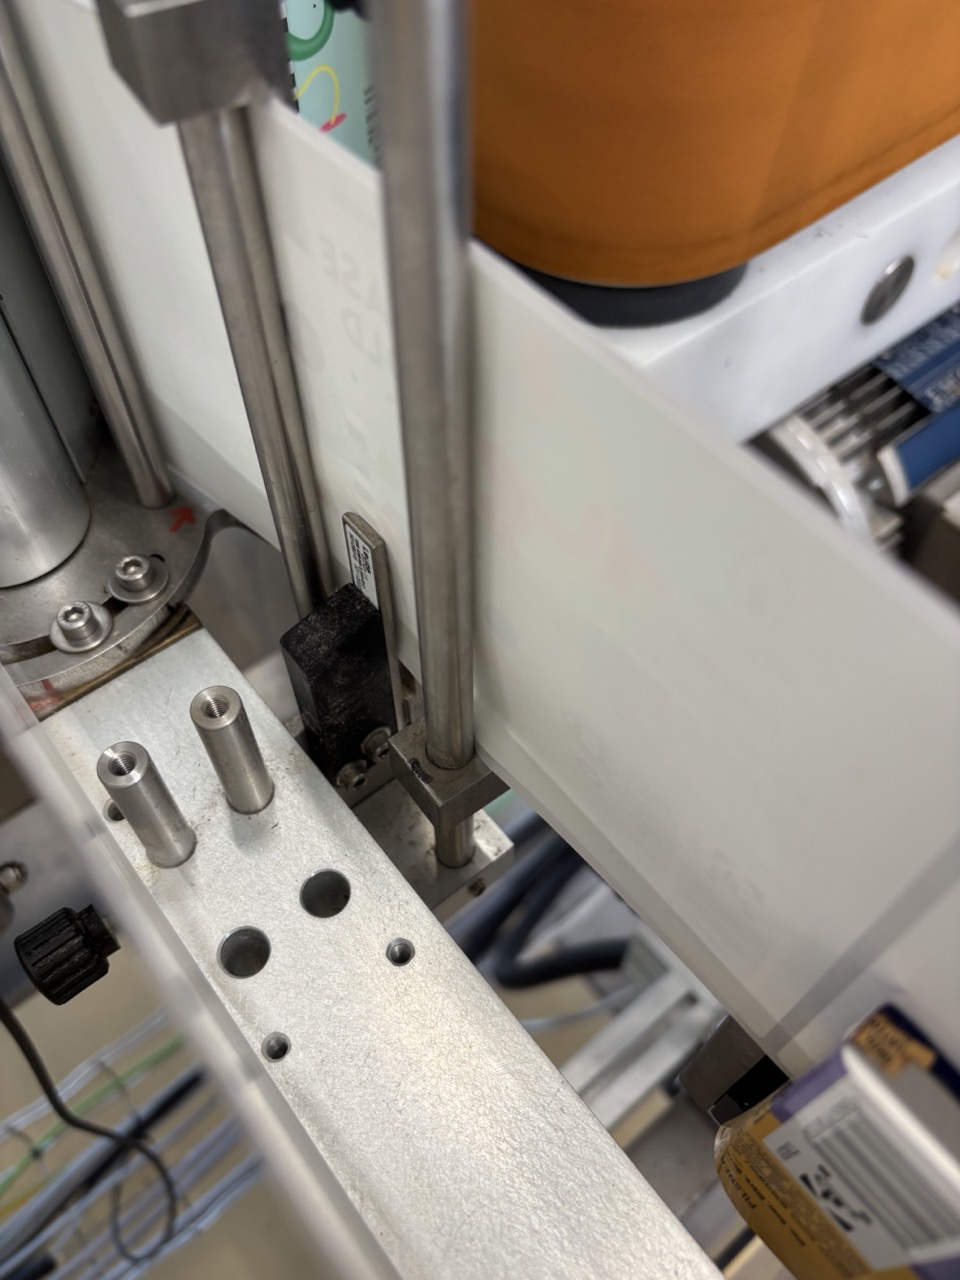
-
Top pin — guides the label from above.
2.3 Roll support (fixator)
- Large roll: do not use the fixator — the roll rests on the platform and feeds naturally from its own weight.
- Small roll: place the fixator on top of the roll only (upside-down, contact from above). This reduces friction compared to standard mounting.
Warning
If the label roll squeaks or creates high friction at any size, remove the fixator entirely.
3. Splicing a New Roll Mid-Run
Same design (continuing the same label)
Connect the rolls back-to-back so the splice looks like one continuous roll — the labeller does not detect any difference. No pitch remeasure, no date or Realend reset needed.
- Tear the old roll carrier paper cleanly at the trailing edge.
- Apply a strip of tape to the back (non-label side) of the new roll's leading edge.
- Lay the old roll's trailing end on top of the new roll's leading edge — old on top, new underneath.
Warning
Old roll must always be on top. If it is placed underneath, labels catch on the exit point of the applicator head and misapply or tear.
Continue the run — no further action required.
New design (switching to a different label)
Splice the rolls the same way (old on top, tape on back). Then:
- Save the new job and date (section 4) — this resets the Batch Count and Label Realend automatically.
- Re-measure Label Pitch (section 5).
- Advance to a correctly dated label at the applicator head before restarting.
4. Setting the Date (Job Selection)
- On the labeller screen, press Job.
-
Select the appropriate job for this product:
Job code Format When to use 3L 3 lines, 9-month best before Standard — all hazy beers, all lagers 1L 1 line, 1-year best before Small cans — not enough space for 3 lines -
Select the correct best-before date.
- Press OK.
- Date is saved and the Batch Count resets automatically.
Note
Re-selecting the same job (e.g. second batch of the same IPA same day) also resets the Batch Count. Do this at the start of each new batch even if the job and date are unchanged.
4.1 Set Label Realend immediately after saving
When a job is saved, the Label Realend counter resets to a default low value. Set it immediately:
| Carrier type | Label Realend setting |
|---|---|
| Standard (cardboard core) | 150 |
| Plastic core | 200 |
Label Realend tells the machine how many labels remain after the roll-empty sensor triggers. If left at the default the machine will stop prematurely.
5. Label Pitch Measurement
Run this when loading a new design — after a new-design roll change or a new-design splice. Not needed when splicing the same design back-to-back.
- On the labeller screen, press 3.
- Navigate to Label Pitch → Measure and confirm.
- Wait for the measurement to complete.
- Acceptable result: within ±0.2 mm of the previous value.
- Exit the settings screen — manual advance does not work while settings are open.
- Press the manual advance button until a correctly dated label reaches the front of the applicator head.
- Typically 3 presses after a measurement for a dated label to arrive.
- Correct position: label sits flush at the applicator head, not protruding at the rear.
6. Label Height and Guide Rails
Two guide rails grip the label: one from below, one from above. Both must engage the label correctly.
After a roll change, verify the leading edge of the new label is seated between both rails. Press down into the lower rail if needed.
If the label is applying at the wrong height on the can:
- First check the guide rails — incorrect rail seating is the most common cause of height errors.
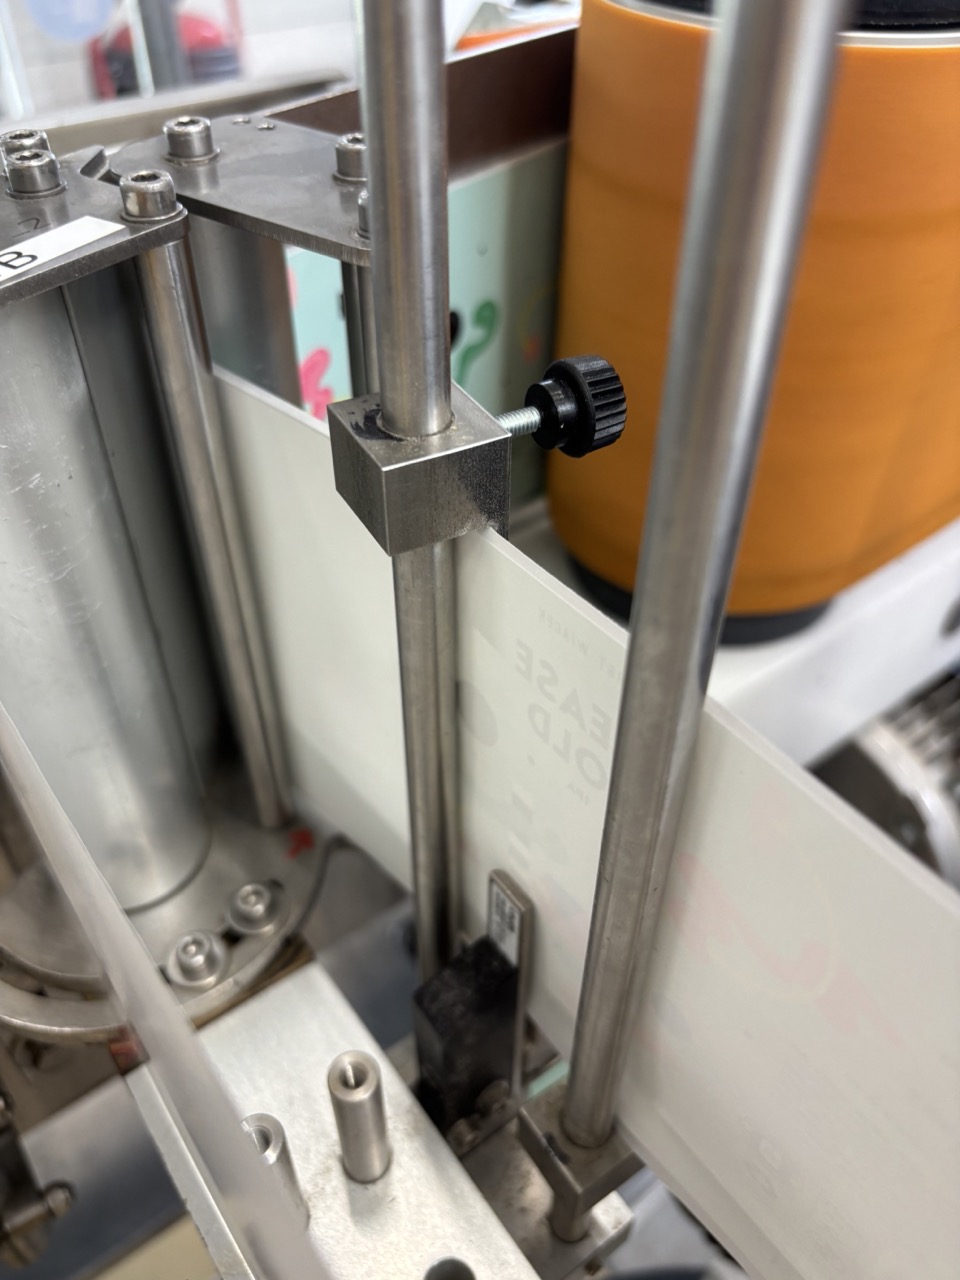
- If rails are correctly seated and height is still wrong, adjust the height wheel on the machine body:
- Use very small turns only.
- Higher number → label sits higher on the can.
- The wheel raises or lowers the entire labeller assembly along its column.
7. Starting the Machine
- Confirm a dated label is at the correct position at the applicator head.
- On the right computer, press Start → the conveyor belt starts moving.
- Press Infeed Gate → cans are released onto the belt.
- Check the first few labelled cans: position correct, date visible, no lifting or bubbling.
Note
Start activates the belt only. Infeed Gate controls whether cans enter the line. Both must be active for cans to be labelled.
8. Stopping and Error Recovery
- Stop: press Stop on the right computer.
- Reset after an error: reset at the labeller display first, then press Reset on the right computer.
9. Videojet Ribbon Replacement
The Videojet inkjet printer uses a thermal transfer ribbon (ink roll) to print dates onto labels. Replace the ribbon when the printer reports it is running low or when dates are printing faintly or inconsistently.
9.1 Open the Videojet
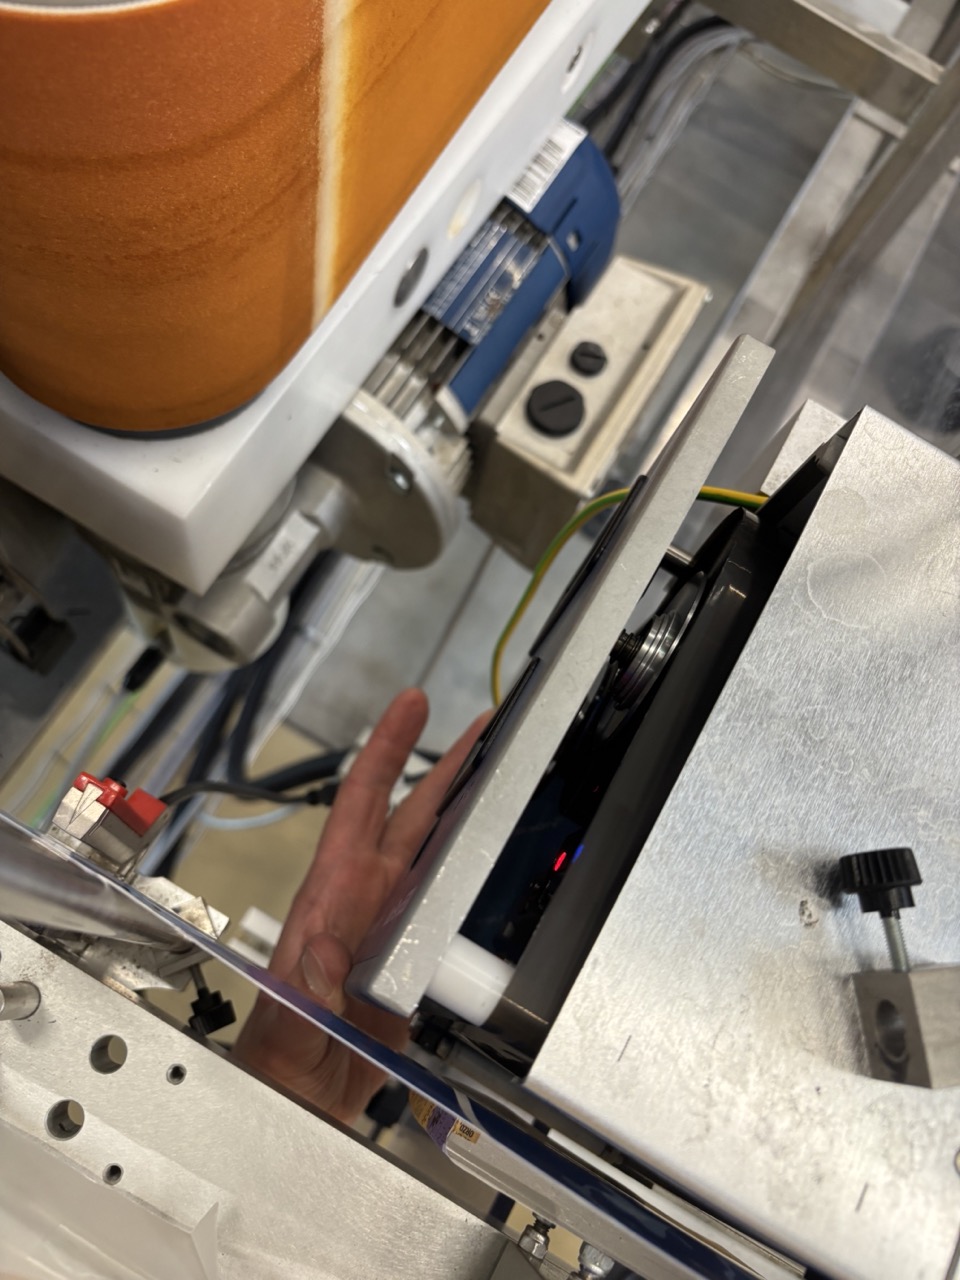
Press the open button on the Videojet to release the cover.
The cover opens to reveal the internal ribbon mechanism. You will need to pull the entire printer unit out to access the ribbon rolls. You may need to remove the labeller spacers first to create enough clearance.
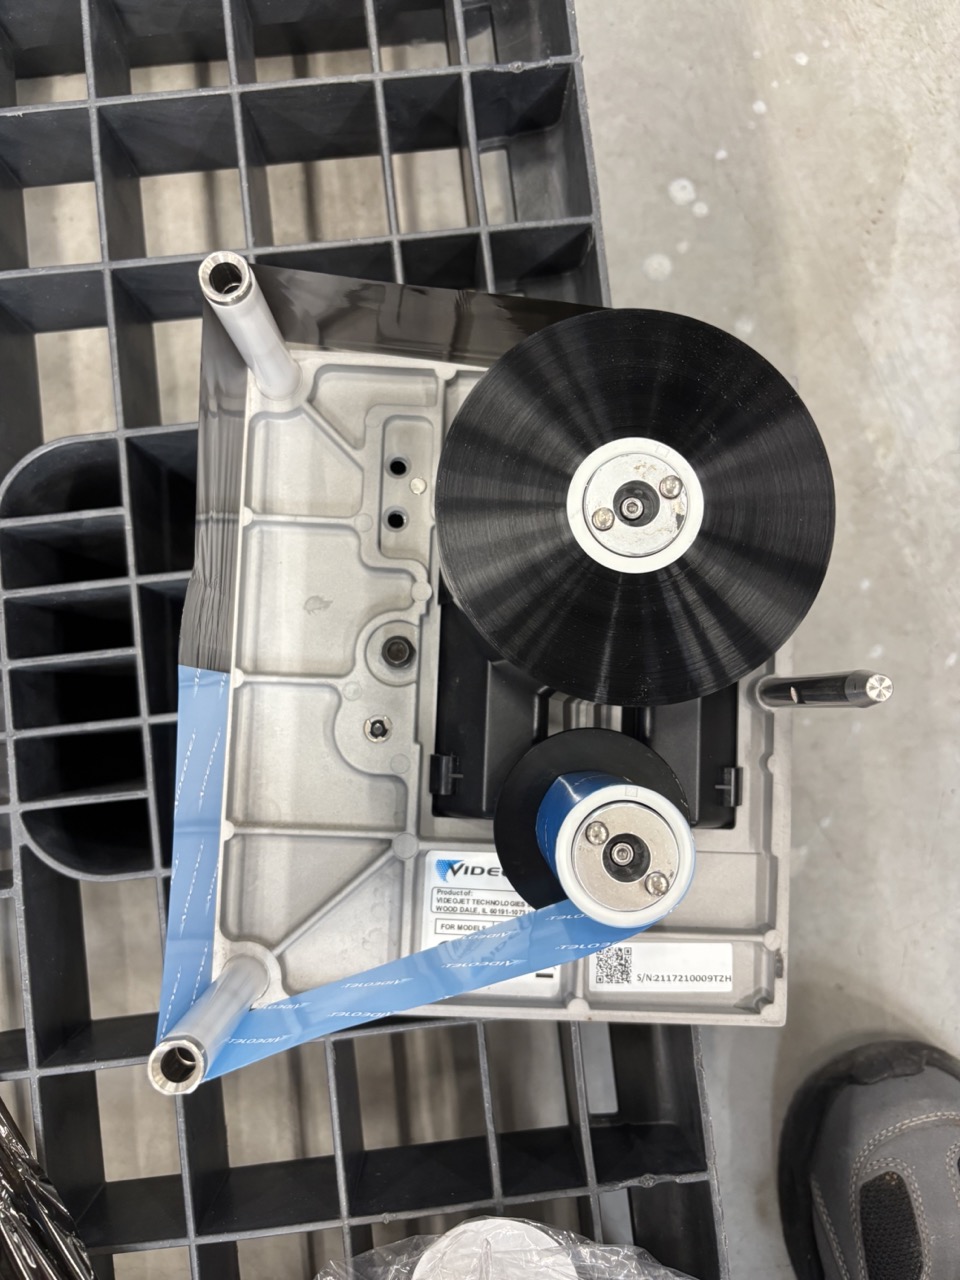
9.2 Replace the Ribbon
- Remove the old ribbon assembly — both the source roll (full side) and the receiver roll (used ribbon side).
- Insert the new ribbon roll. Thread the ribbon through the mechanism following the path shown on the unit.
-
Ensure there are no wrinkles in the ribbon across the print head. Any wrinkle will cause misprints or blank labels.
9.3 Reinstate and Verify
- Slide the printer unit back into the Videojet case.
- Reinstall any spacers removed earlier.
- Press Start on the Videojet. You may need to reselect the correct recipe (job/date).
- Verify the printer is printing by running a test label.
- Check that Printing Device Bypass is set to Off on the labeller (Menu → Controls → Printing Device Bypass). This bypass can activate after a restart and silently disables printing.
Troubleshooting
| Symptom | Likely cause | Fix |
|---|---|---|
| Labels applying inconsistently or poorly | Cans too dry | Lightly wipe the conveyor belt with a damp sponge |
| Squeaking during operation | Label being pulled off the can | Dampen conveyor belt; if persistent check label roll friction |
| Intermittent feed or wrinkled carrier paper | Carrier paper tangled on receiver | Remove carrier paper from receiver completely and re-wind from scratch |
| High friction / label roll not spinning freely | Fixator in use on large roll | Remove fixator |
| Label applying at wrong height | Guide rails not gripping correctly | Re-seat label in both rails |
| Label applying at wrong height (rails correct) | Labeller height not set | Adjust height wheel in small increments |
| Date not printing | Videojet not running | Check Videojet — green indicator button must be lit |
| Date not printing | Temporary Bypass active | Menu → Controls → Printing Device Bypass → set bypass to Off |
| Machine stops before roll is empty | Label Realend set too low | Set Label Realend to 150 (cardboard) or 200 (plastic) after next job save |
| Error light / machine stopped | Error not cleared | Reset at labeller display, then Reset on right computer |
Warning
Temporary Bypass (Menu → Controls → Printing Device Bypass) activates automatically after a computer restart and disables the Videojet printer — labels feed without any date. Check this setting after every system restart before running.
Checklist
Before run
- [ ] Correct label roll loaded and confirmed against brew sheet
- [ ] Receiver emptied if carrier paper was at or past marker line
- [ ] Videojet powered on — green indicator lit
- [ ] Temporary Bypass confirmed Off (Menu → Controls → Printing Device Bypass)
- [ ] Job selected and best-before date confirmed
- [ ] Label Realend set: 150 (cardboard core) / 200 (plastic core)
- [ ] Label Pitch measured — result within ±0.2 mm
- [ ] Dated label at correct position at applicator head (flush, not protruding)
- [ ] Both guide rails engaging label correctly
First cans
- [ ] Label position correct on can — no lifting, no bubbling
- [ ] Date printed and correct
- [ ] No squeaking or excessive friction
After same-design splice mid-run
- [ ] Old roll on top at splice point
- [ ] Continue run — no further action needed
After new-design roll change or splice
- [ ] Old roll on top at splice point
- [ ] Job and date saved (section 4) — Batch Count and Label Realend reset automatically
- [ ] Label Pitch re-measured (section 5)
- [ ] Dated label advanced to correct position at applicator head