SOP — Steam Generator
FUERST WIACEK Version 1.2 | Utilities — steam system | Frequency: weekly manual start (Mon) + daily check + periodic maintenance
Purpose
The steam generator runs in automatic mode during normal operation. Any unit that requires steam — brewhouse, CIP, packaging — calls for it automatically and shuts it off when finished. No manual intervention is needed during the week once automatic mode is active.
However, the system requires a forced manual start once per week, typically on Monday morning when the first person arrives. This is a safety requirement: it forces someone to enter the steam room, visually check for leaks or unusual noises, and confirm the system is operational before the production week begins. After the manual start, the generator is switched back to automatic mode.
Weekly Manual Start (Monday)
1. Enter Steam Room — Visual Check
Before starting, inspect the steam room for:
- Visible leaks at pipe connections
- Unusual noises (hissing, banging, knocking)
- Any visible damage or spills
If anything is wrong, do not start. Contact the brewmaster.
2. Start the Generator
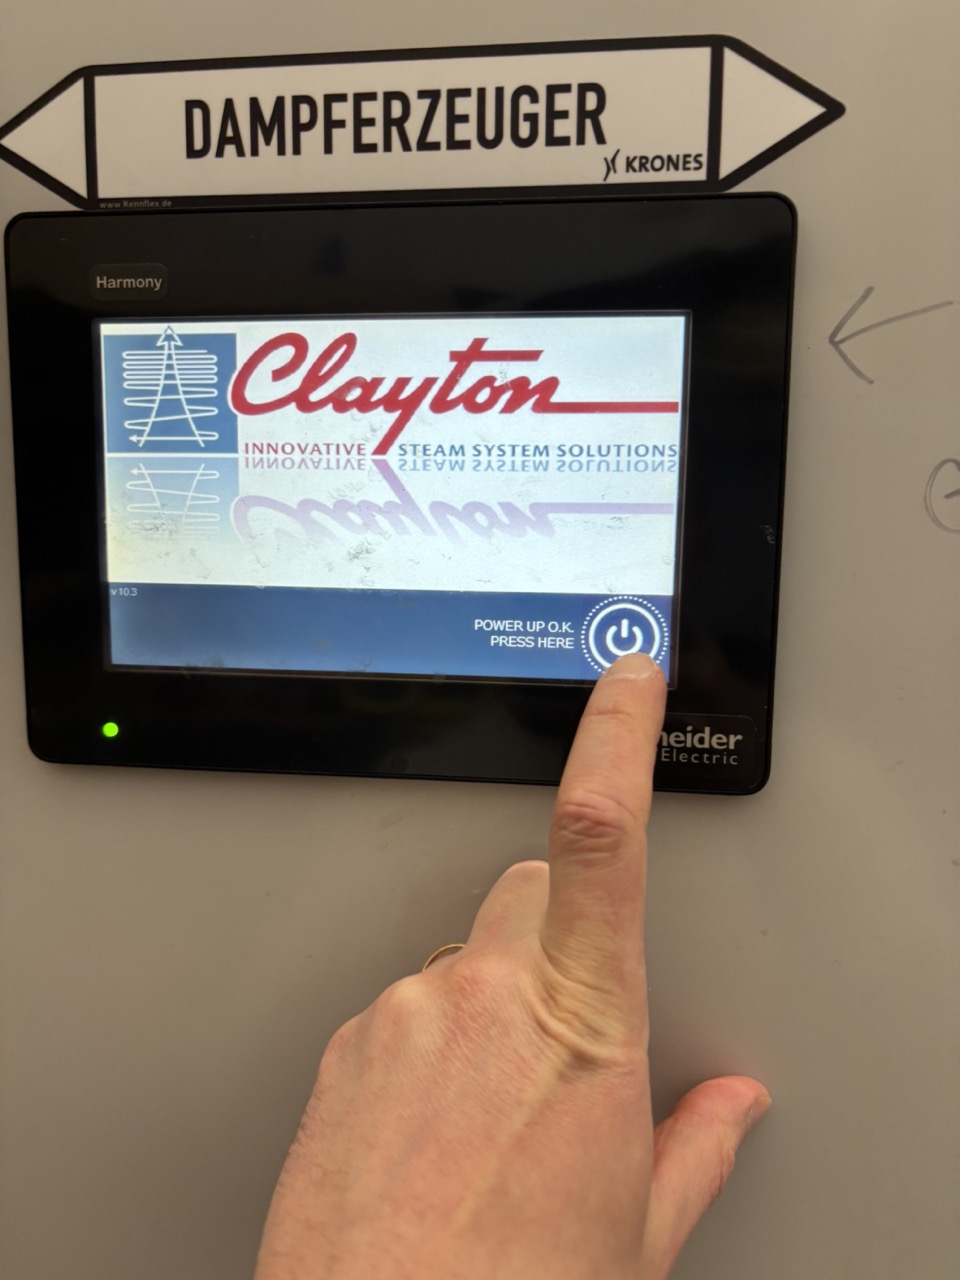
- Touch the screen to wake it up. Press the power button.
-
Press the power button again on this screen.
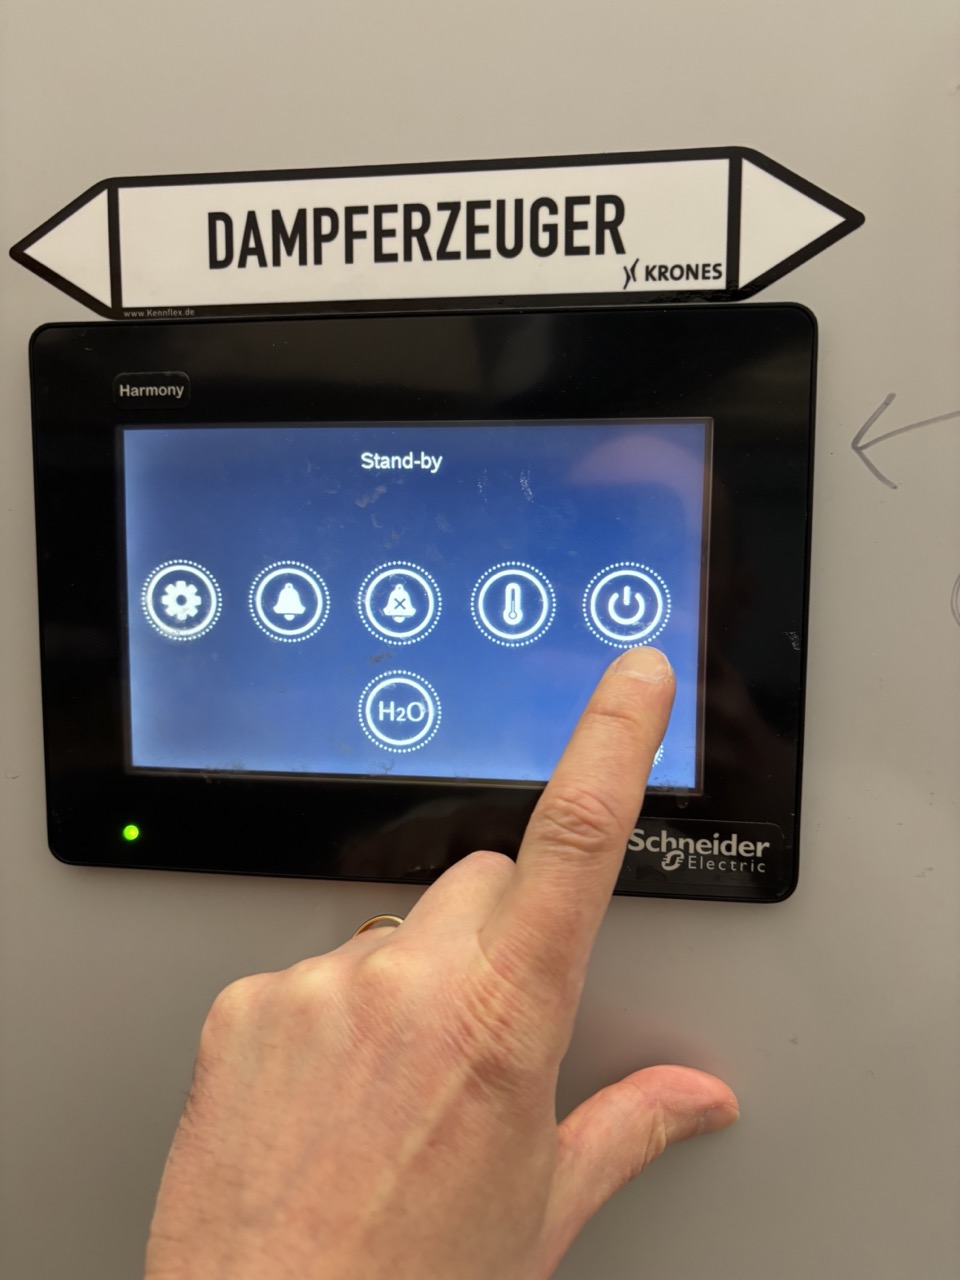
-
Press Stop to deactivate the automatic start function.
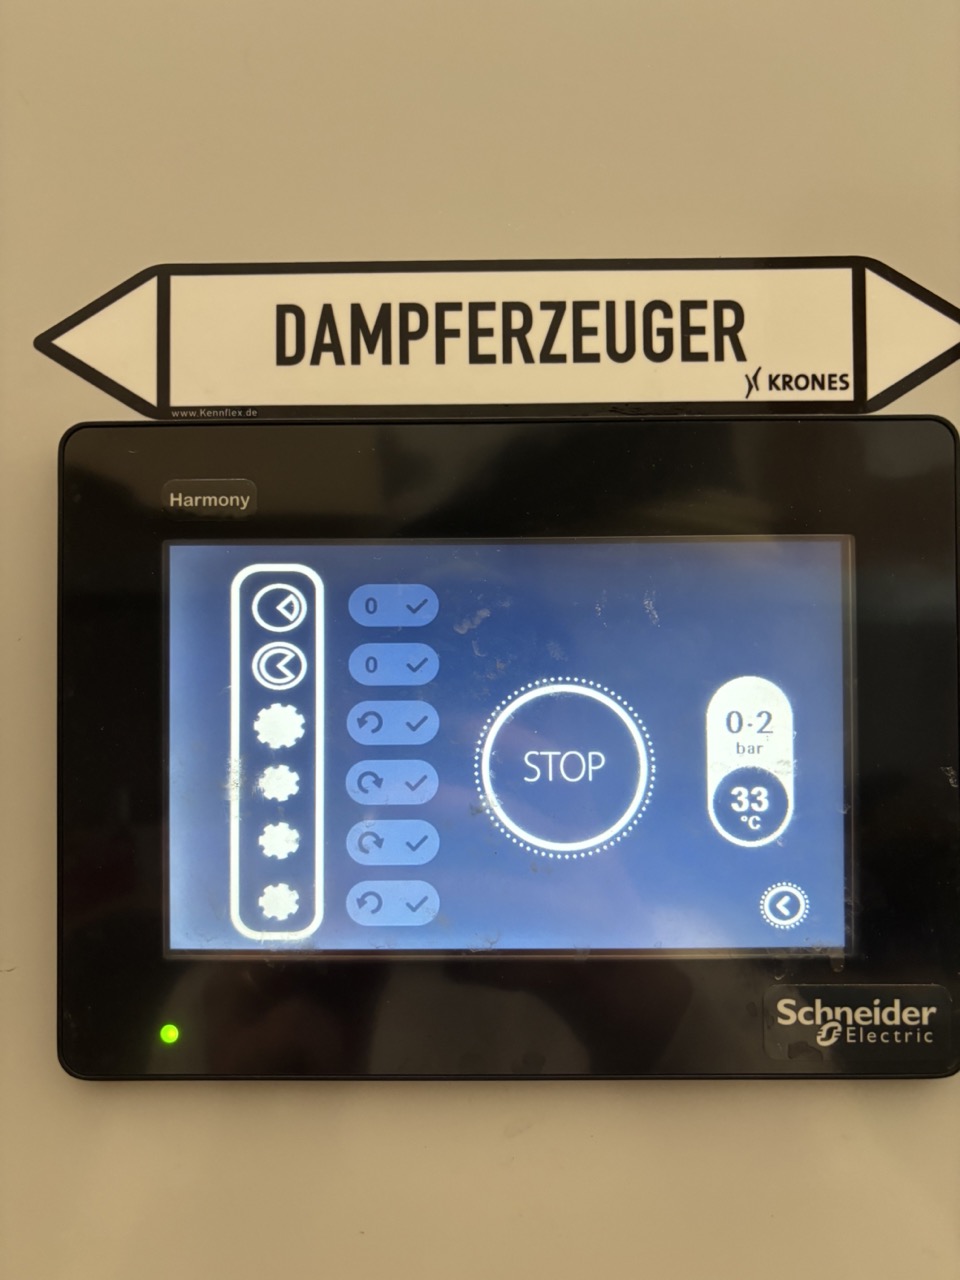
-
Press the power button again (same as step 2).
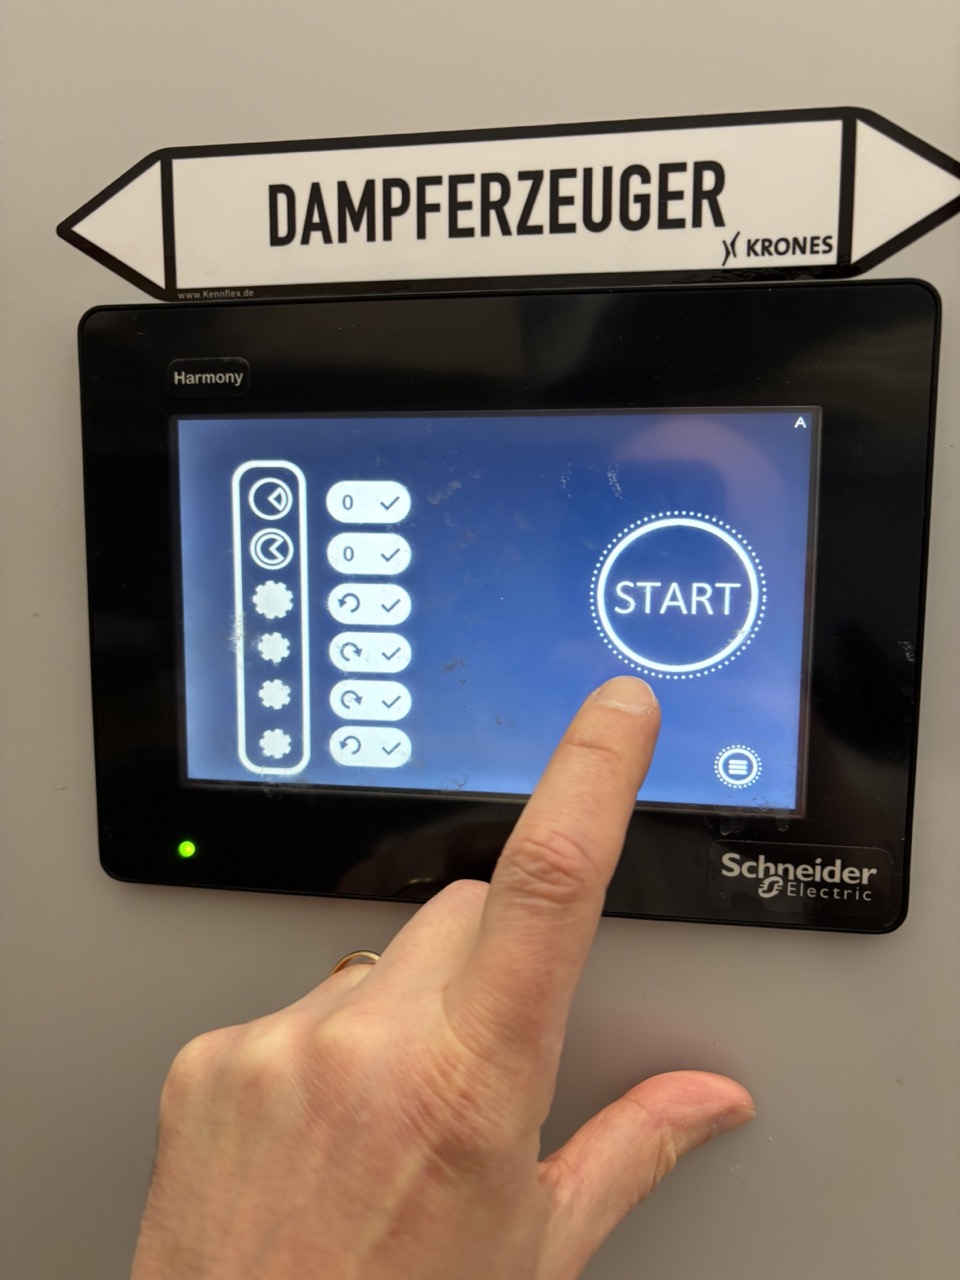
- Press Start. The startup sequence begins and takes a few minutes.
Note
You can continue with other morning tasks during startup. Check back within a few minutes to activate automatic mode (next step).
3. Activate Automatic Mode
Once startup is complete, switch to automatic mode so the generator responds to demand throughout the day without further manual input.
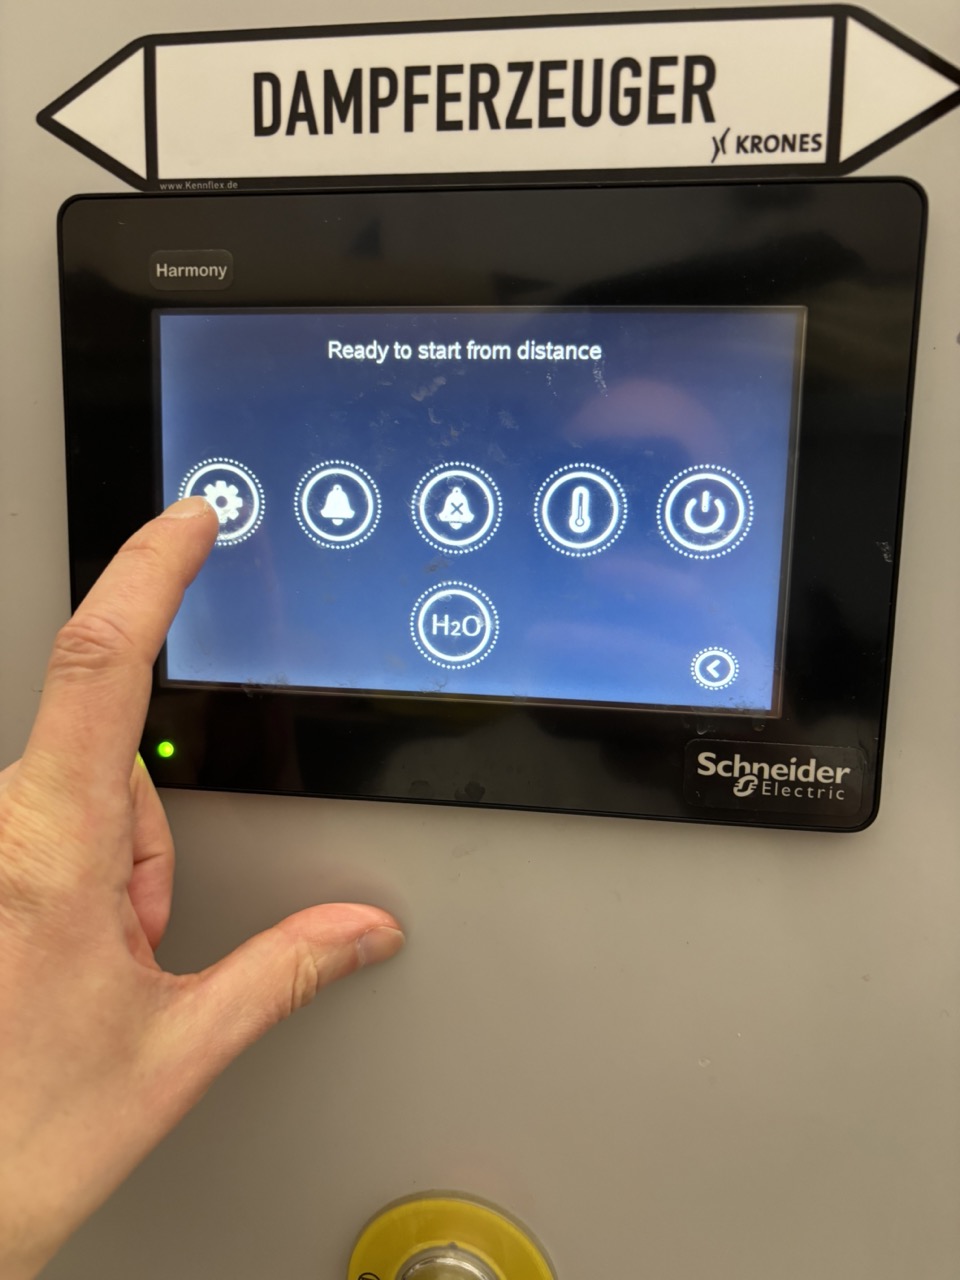
- Press Settings in the main menu.
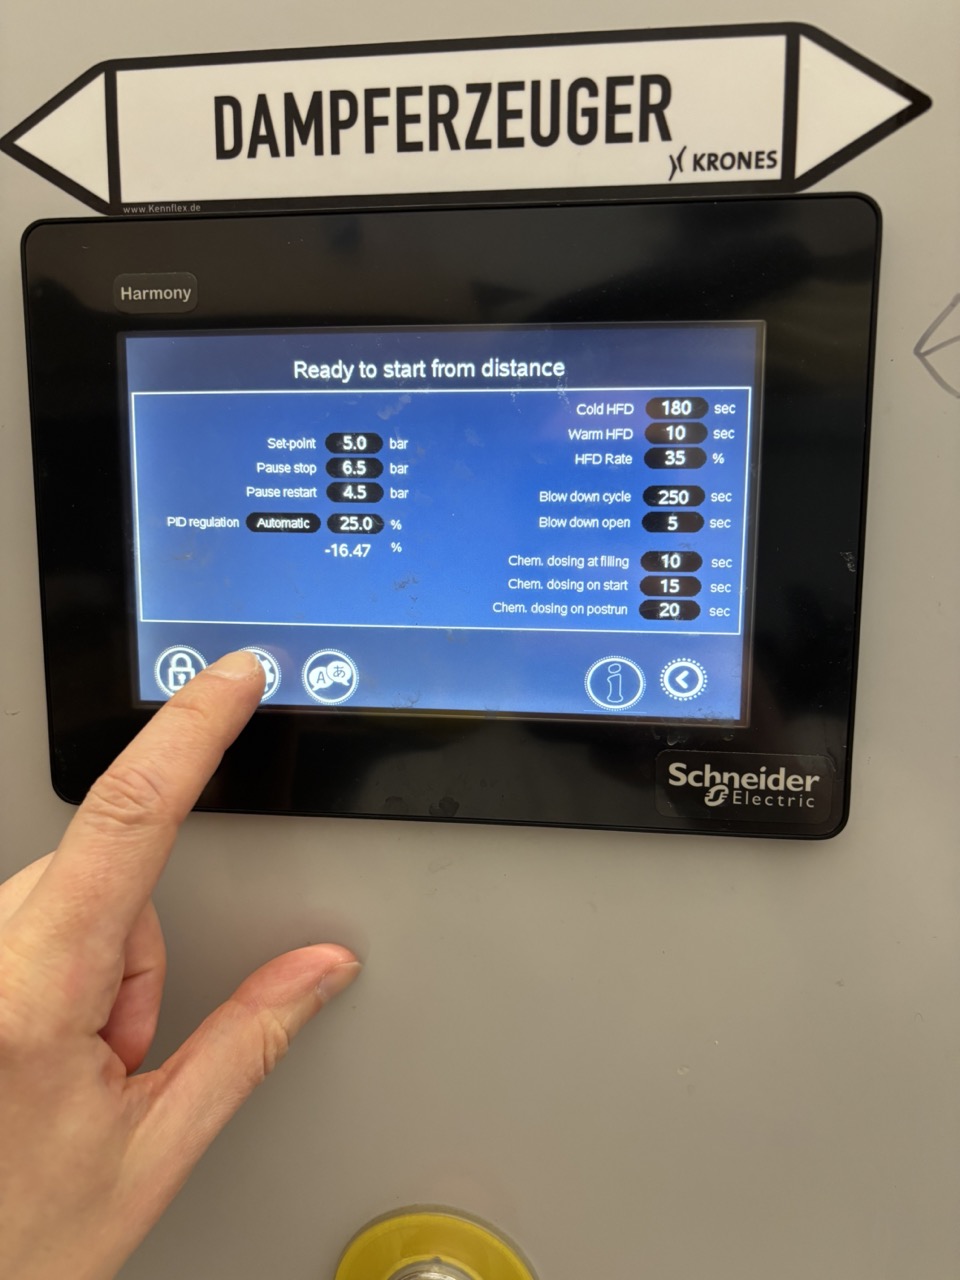
- Press Settings (2) to reach the second settings page.
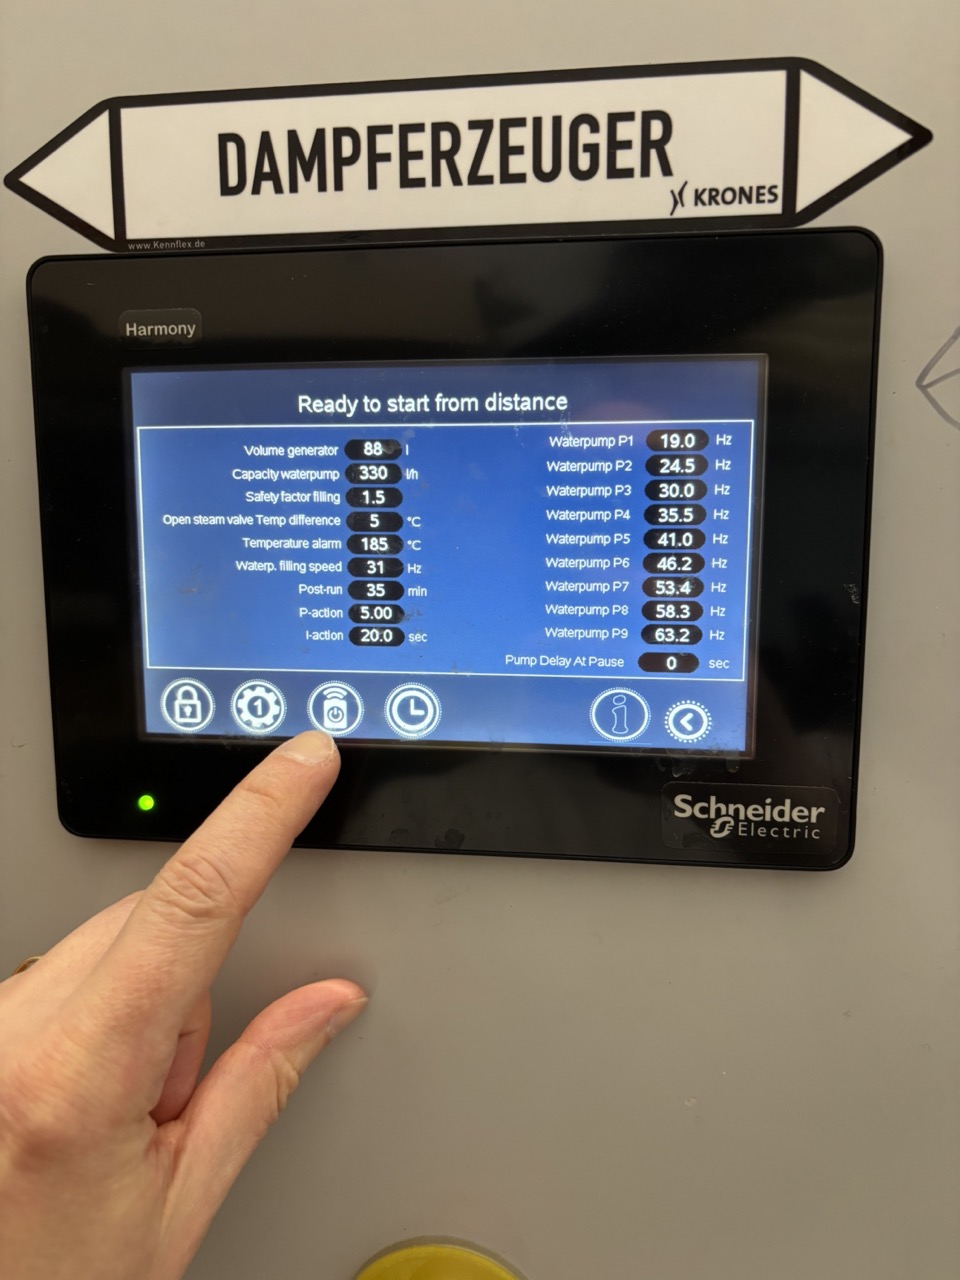
- Press the Remote button. When active, it should not be crossed out.
Warning
The Remote button is only visible after startup is complete. If you can't find it, wait a few more minutes.
Daily Steam Check (Tue–Fri)
- Enter the steam room briefly.
- Confirm the display shows normal operating status — no alarms.
- Listen for unusual sounds; check for visible leaks.
- Log any observations in the Steam Control Sheet.
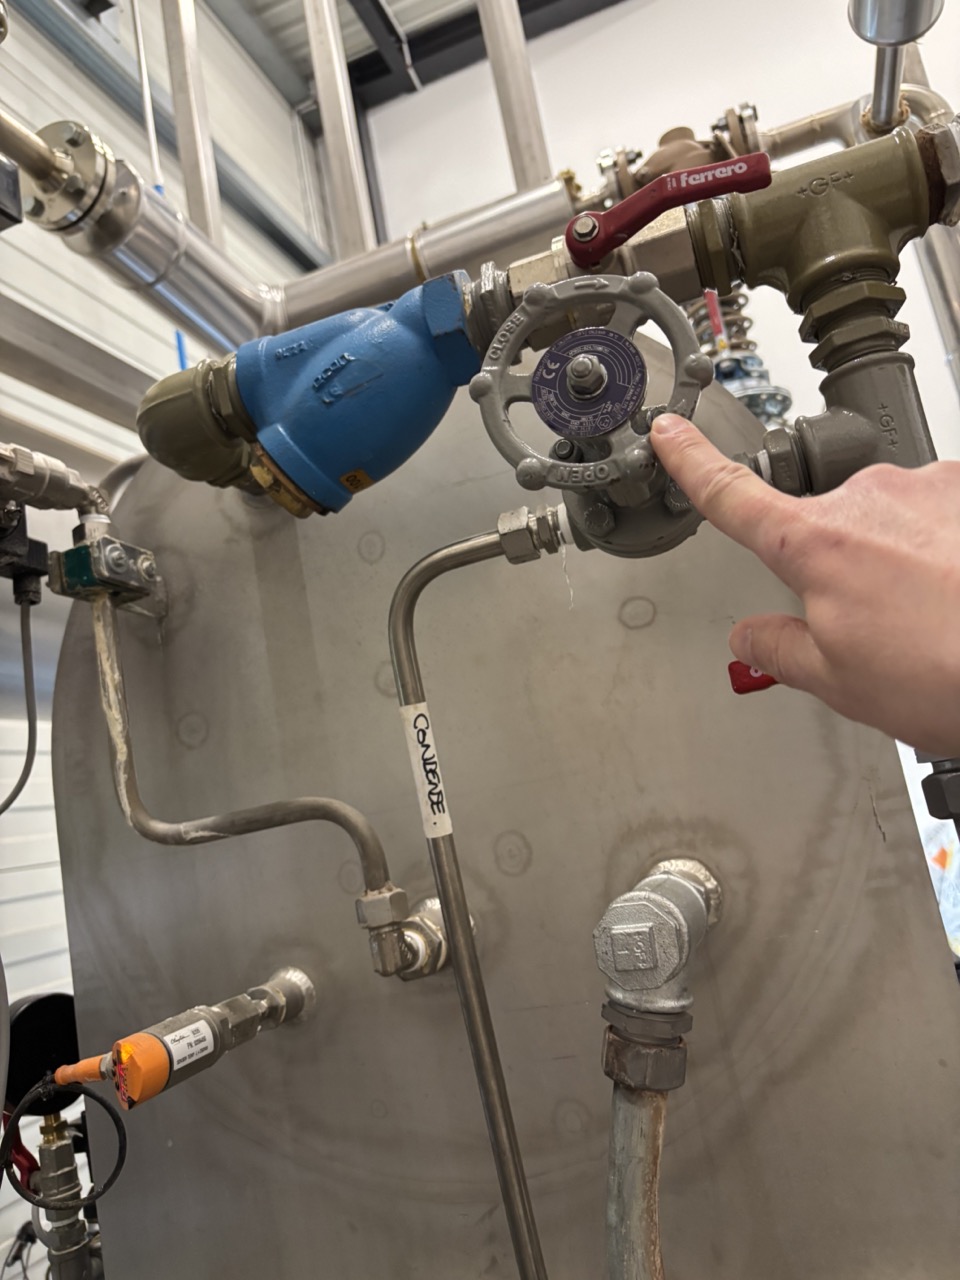
Monday — Hotwell Dump & Condensate Flush
Done on Monday morning as part of the weekly startup, after starting the generator.
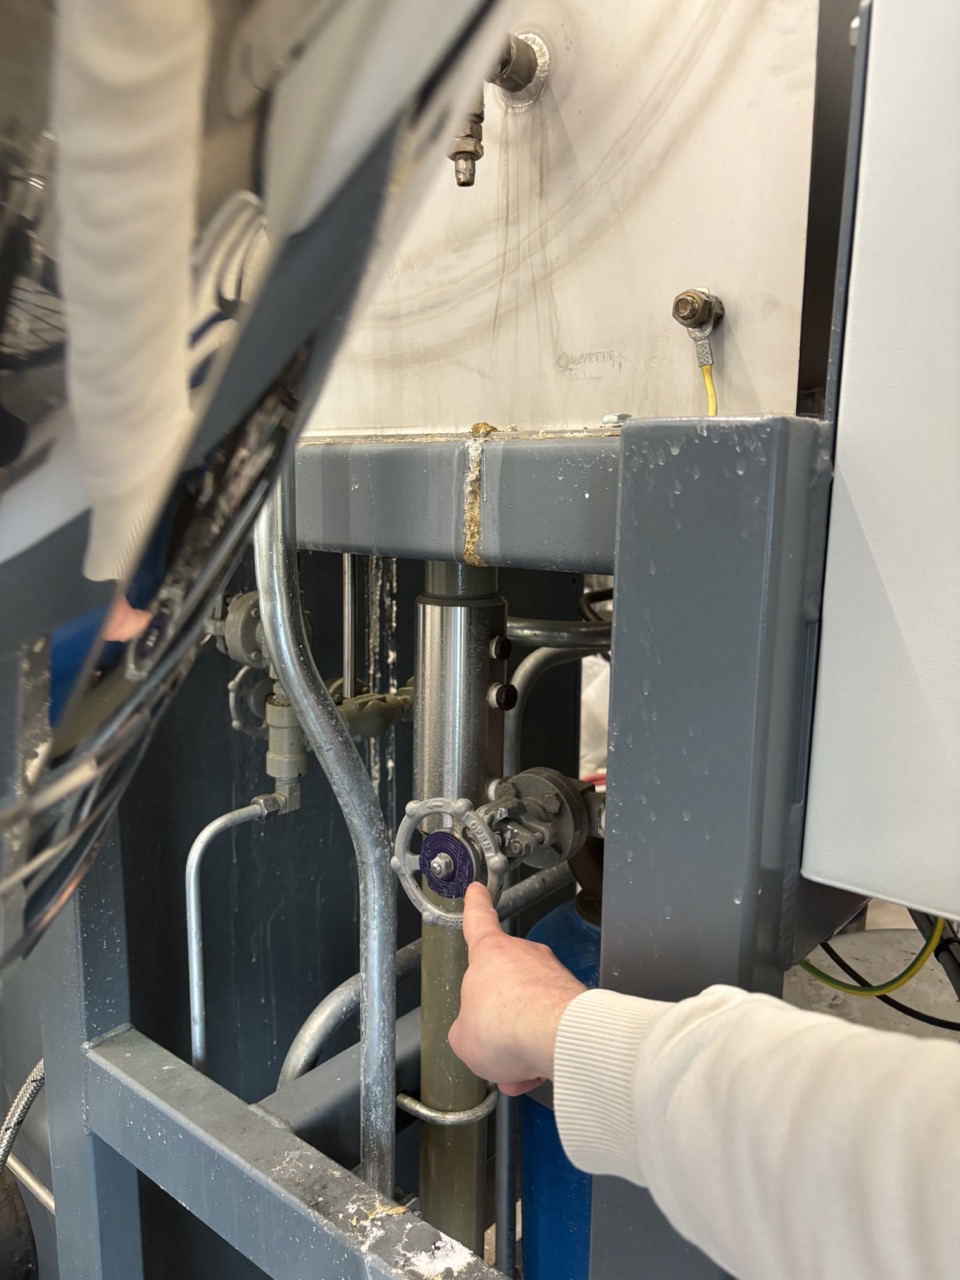
Dump Hotwell Reservoir
Deposits accumulate at the bottom of the hotwell over time. The magnet retains metallic particles near the drain so they flush out during the dump.
- Remove the magnet from the hotwell drain.
- Set a 1-minute timer.
- Open the drain valve and let it run for the full minute.
- Close the drain valve.
- Replace the magnet.
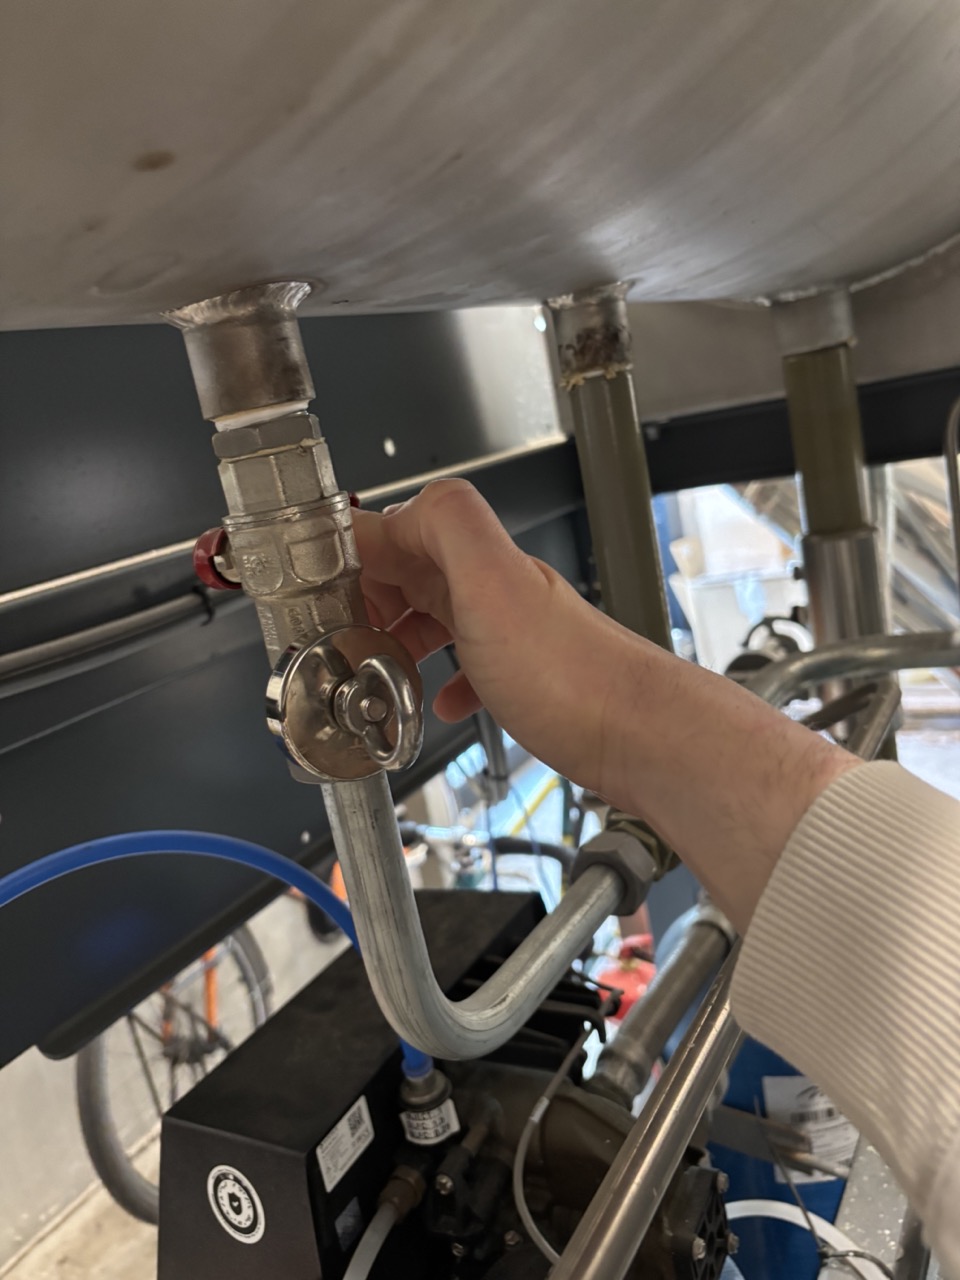
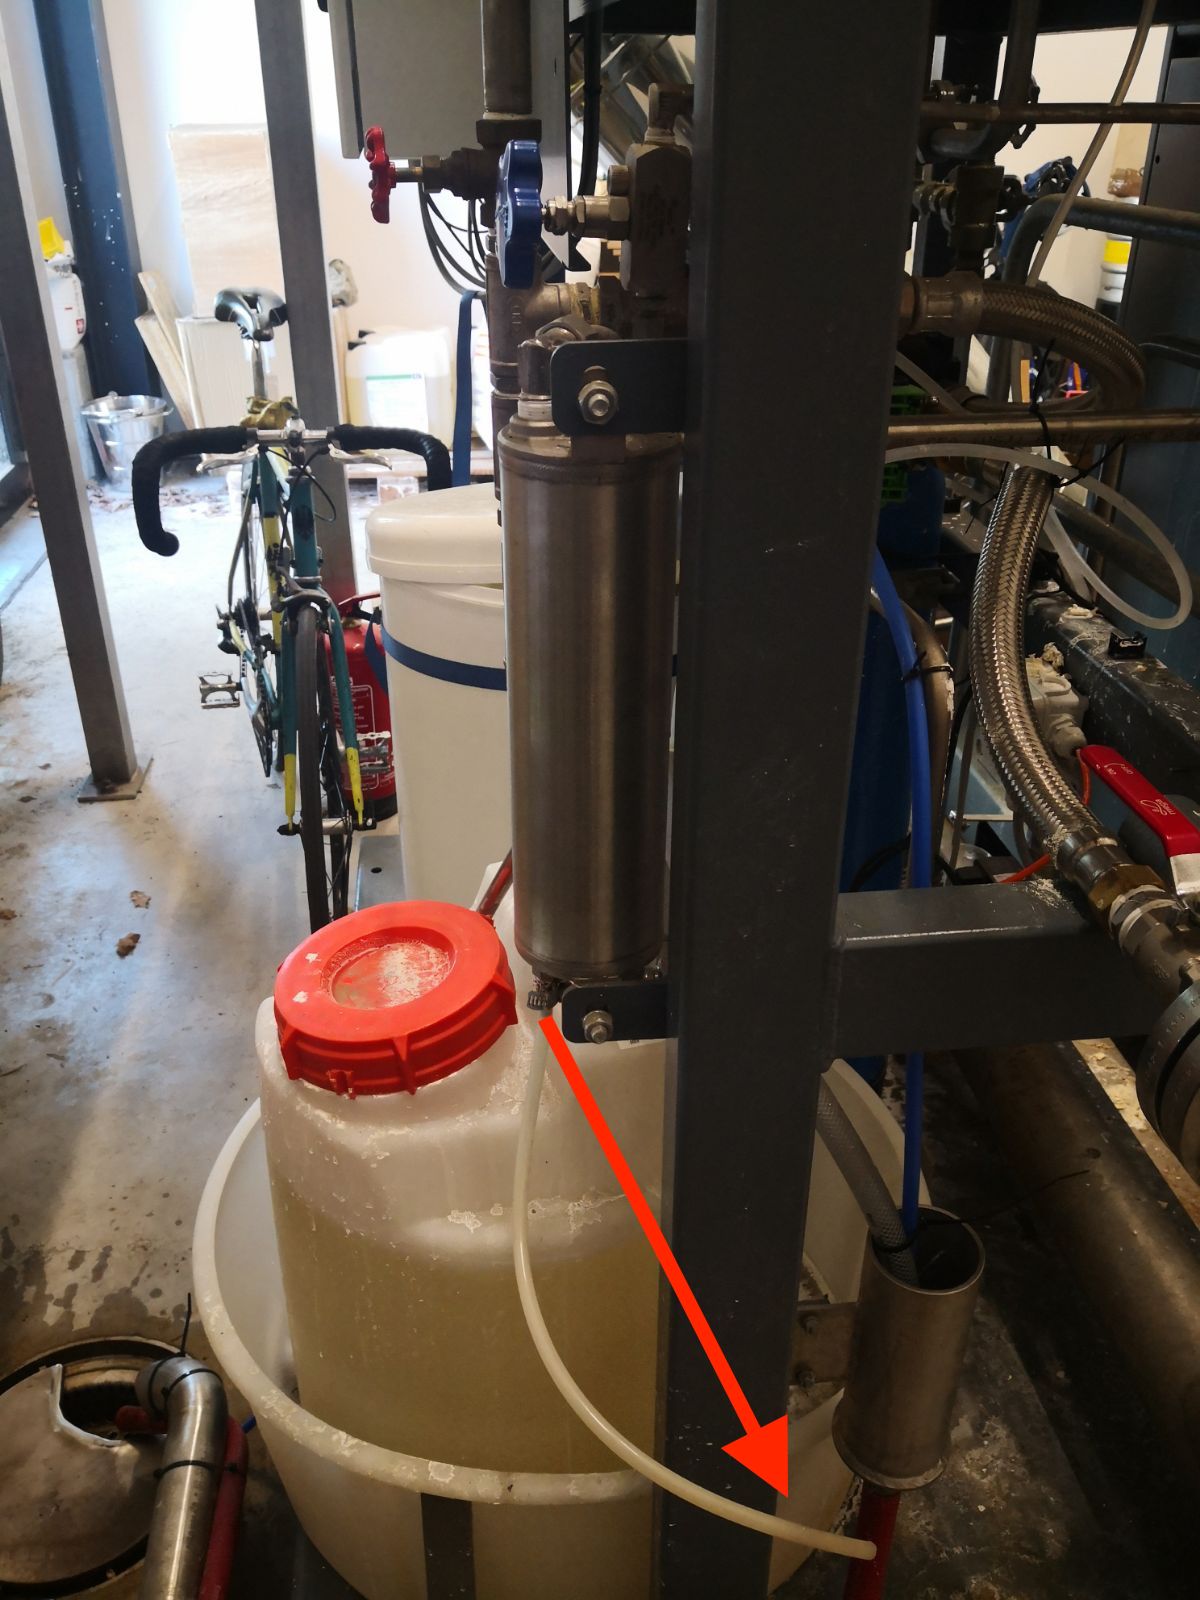
Flush Condensate Line
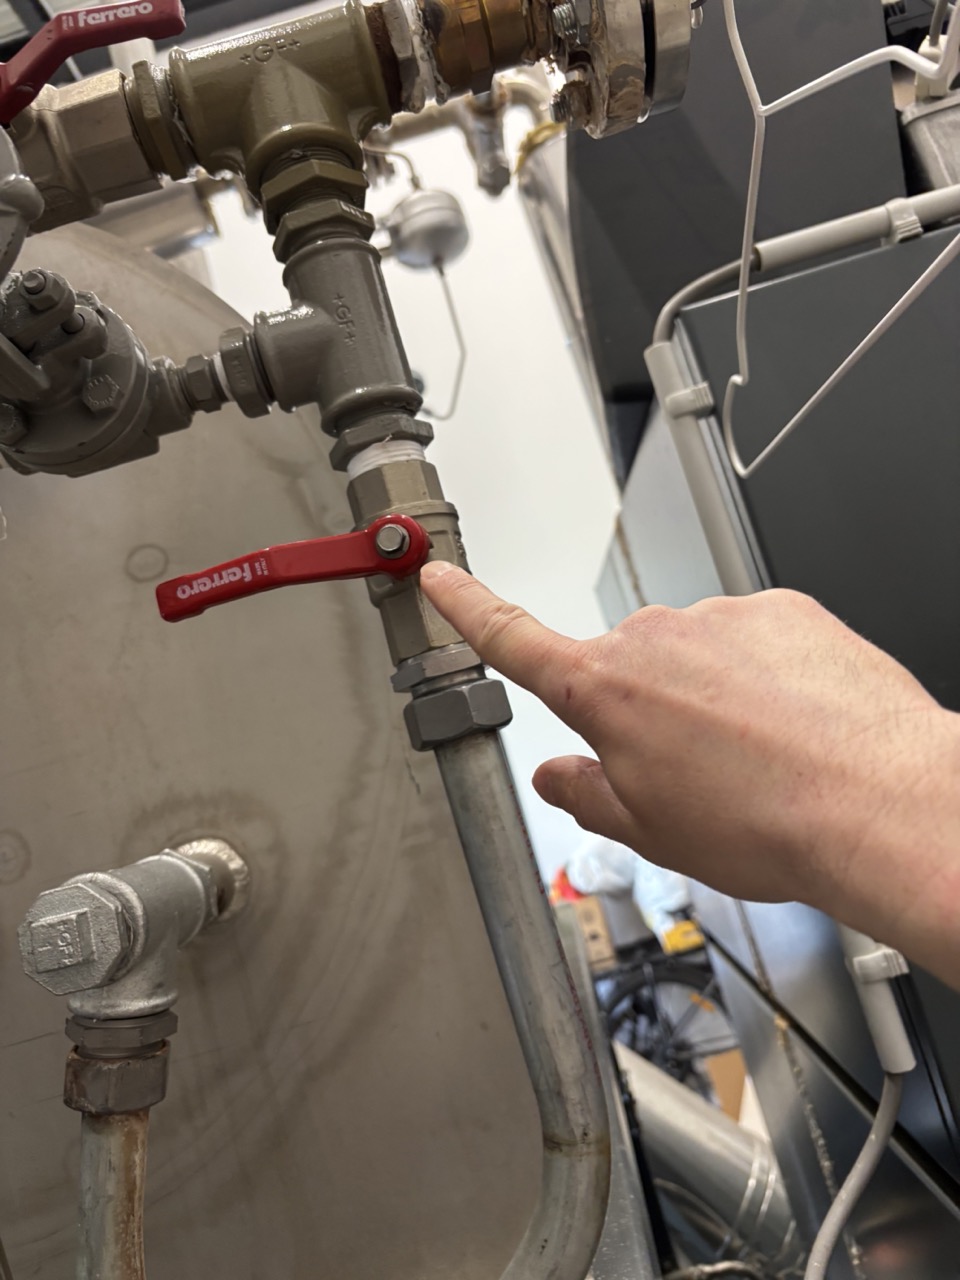
- Open the condensate return valve for 10 seconds.
- Close it.
Periodic Maintenance
Check each item on Mondays. Address as needed — no fixed interval for most.
Filter Swap (every few months)
Replace the filter in the cold water line when it is visibly dirty or discoloured (brown). Visual check is sufficient.
Salt Tablets — Hardness Removal (top up as needed)
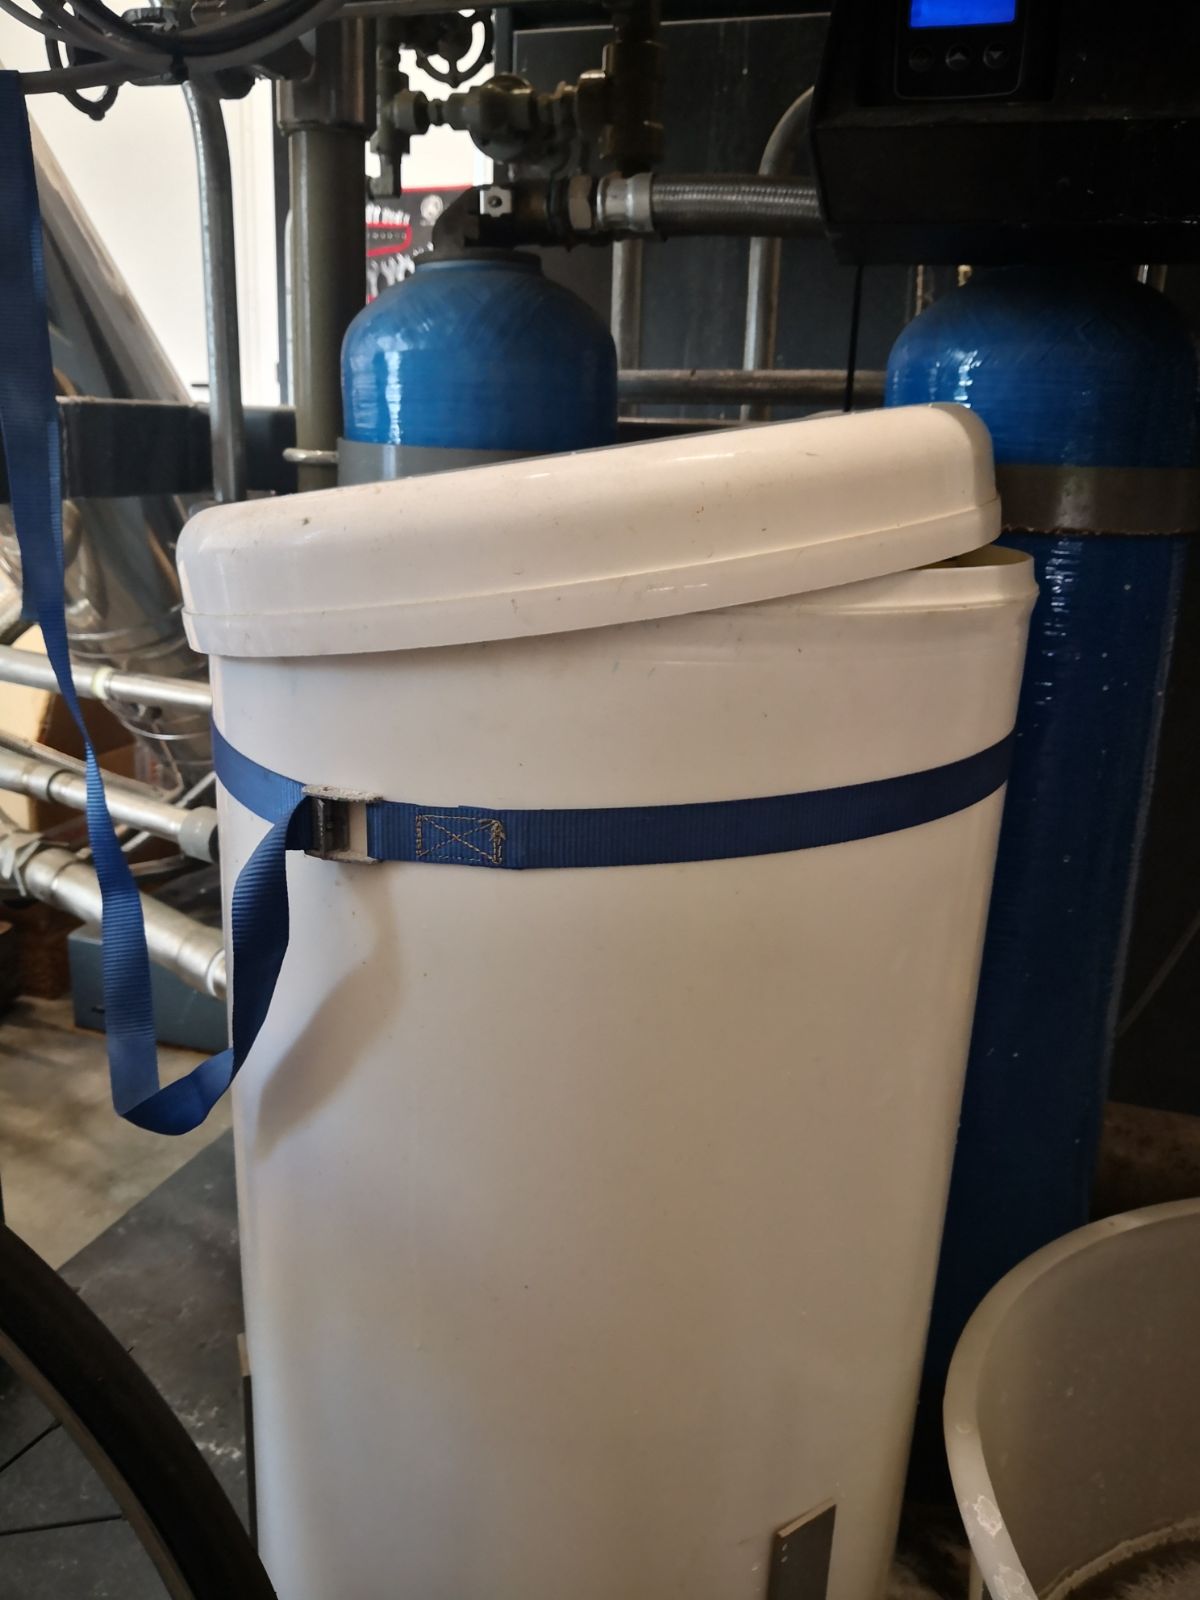
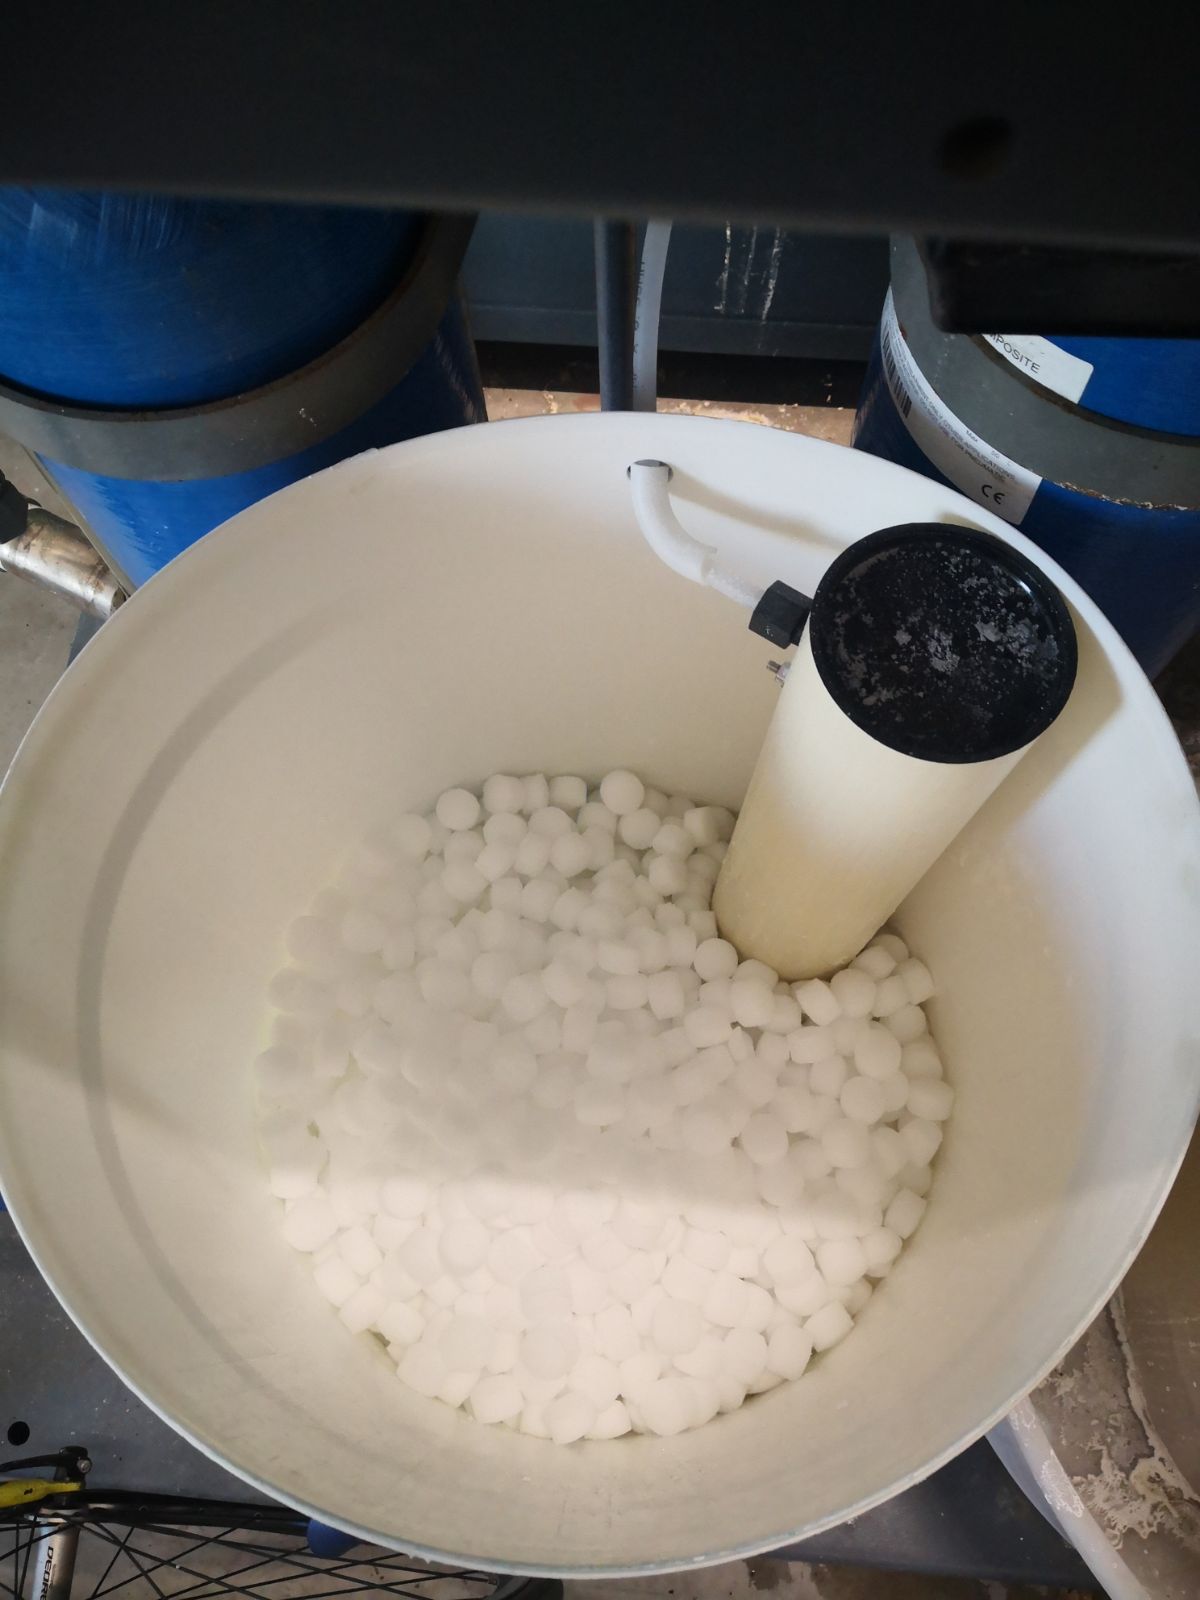
Top up the salt tablets when the level is low. Running out affects water hardness treatment and accelerates scale buildup throughout the system.
Chemical Top-Up — Antioxidant (top up as needed)

The antioxidant prevents corrosion in the steam path. Check the fill level and top up when low.
Weekly Water Checks
Done on a set day during the week — on the production schedule this task appears as Steam Check. Take water quality samples from two sources every week:
- Hotwell (main reservoir — marked T for Tank)
- Condensate (condensate return — marked C)
Record all measurements in the Steam Control Sheet with: date, name, and what process was running at the time (e.g. up-con, CIP, brew, idle).
Warning
Take measurements within 10–15 minutes of collecting each sample. Cool the sample first if you cannot measure immediately.
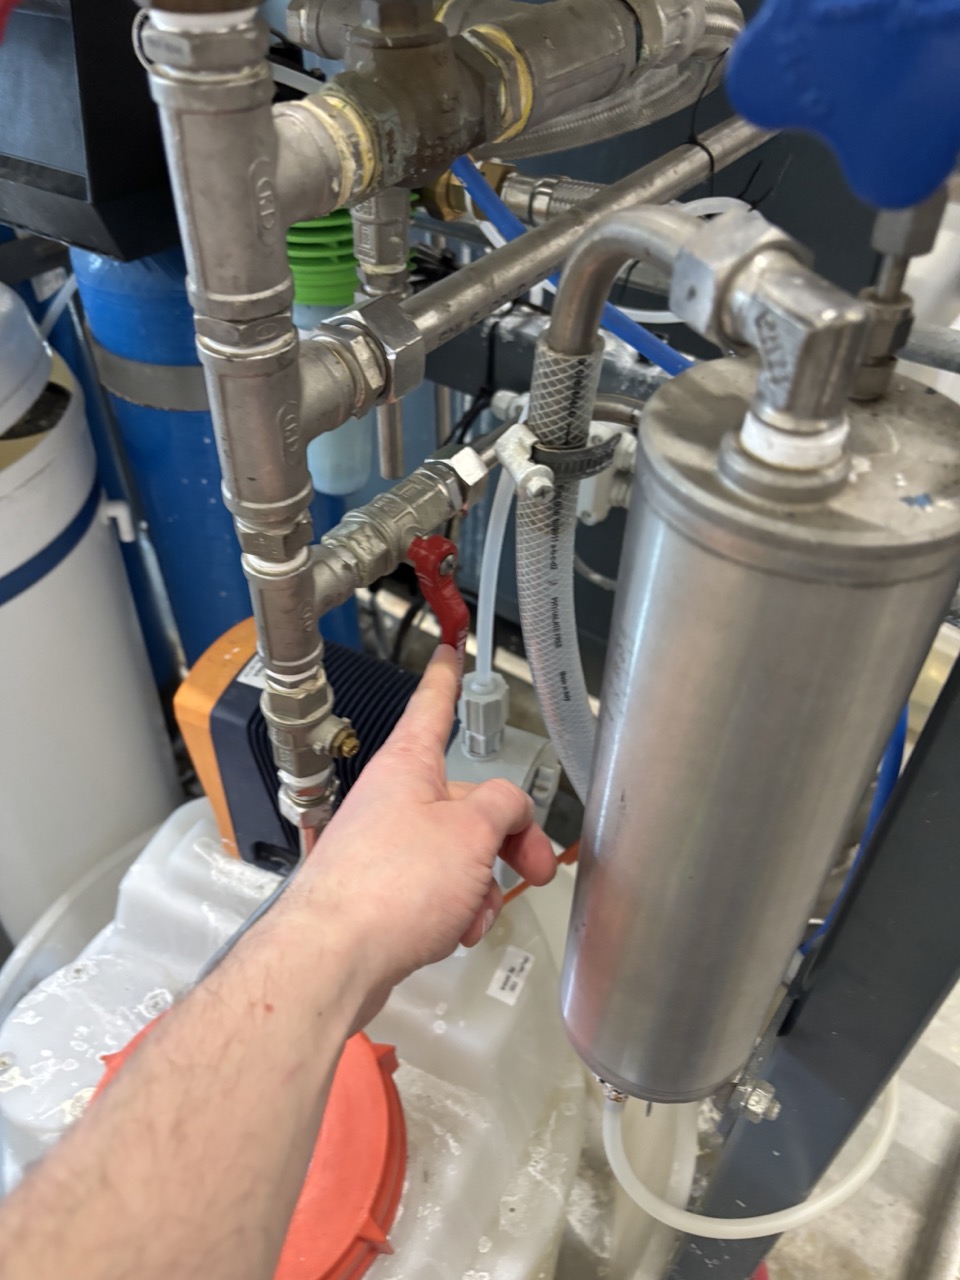
Open the Main Sample Valve
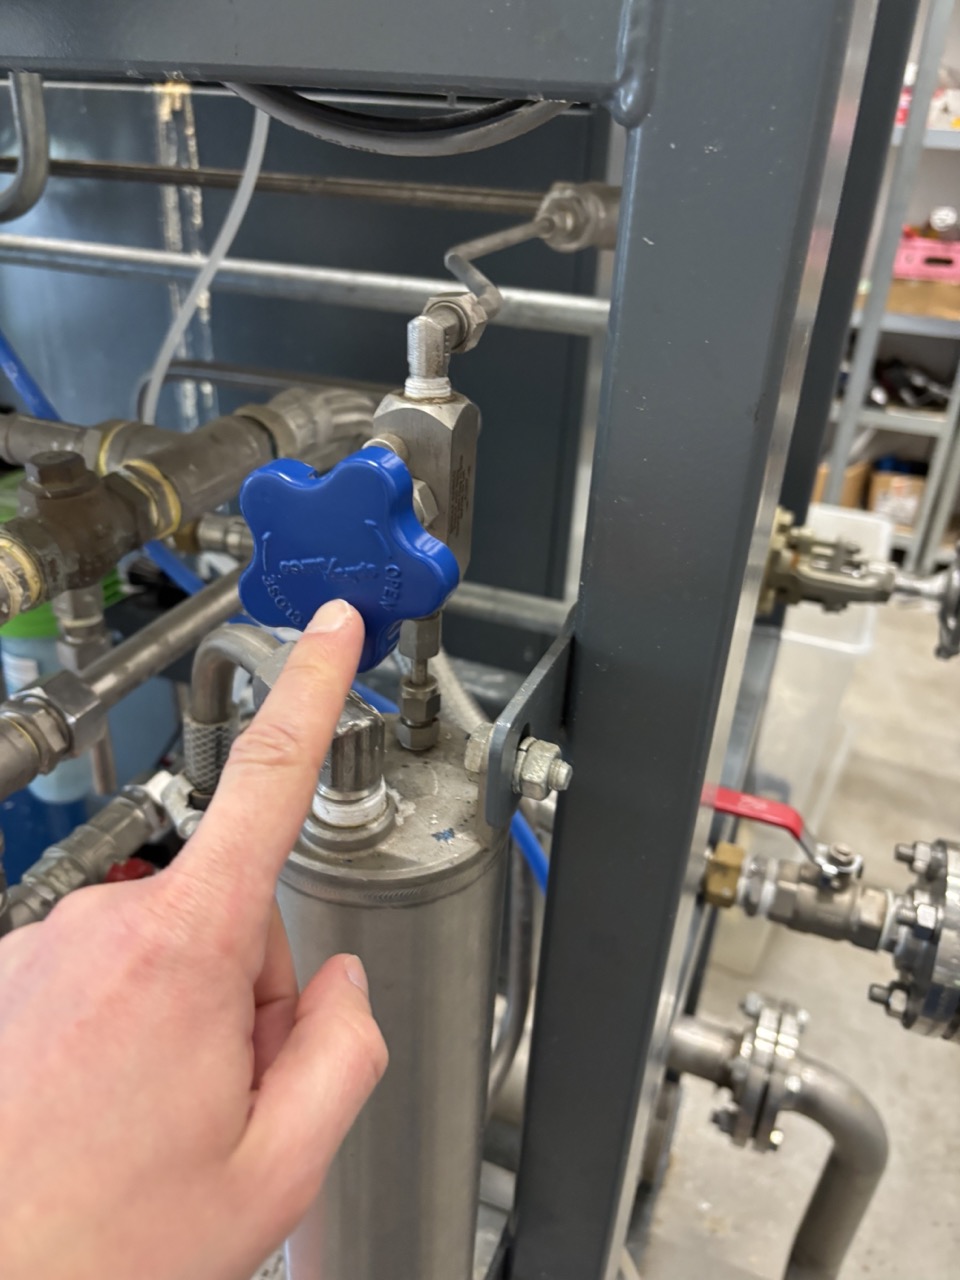
Open the main sample valve (blue). Keep it open for all sampling.
Hotwell Sample
- Open the hotwell sample valve.
- Let the line flush until the liquid is noticeably hot. The pipe from the hotwell to the sample line is long and flow is slow — flushing removes stale residual liquid from the line. Do not collect until it is warm.
- Optionally cool the sample using the sample cooling valve, or collect it hot and set it aside to cool.
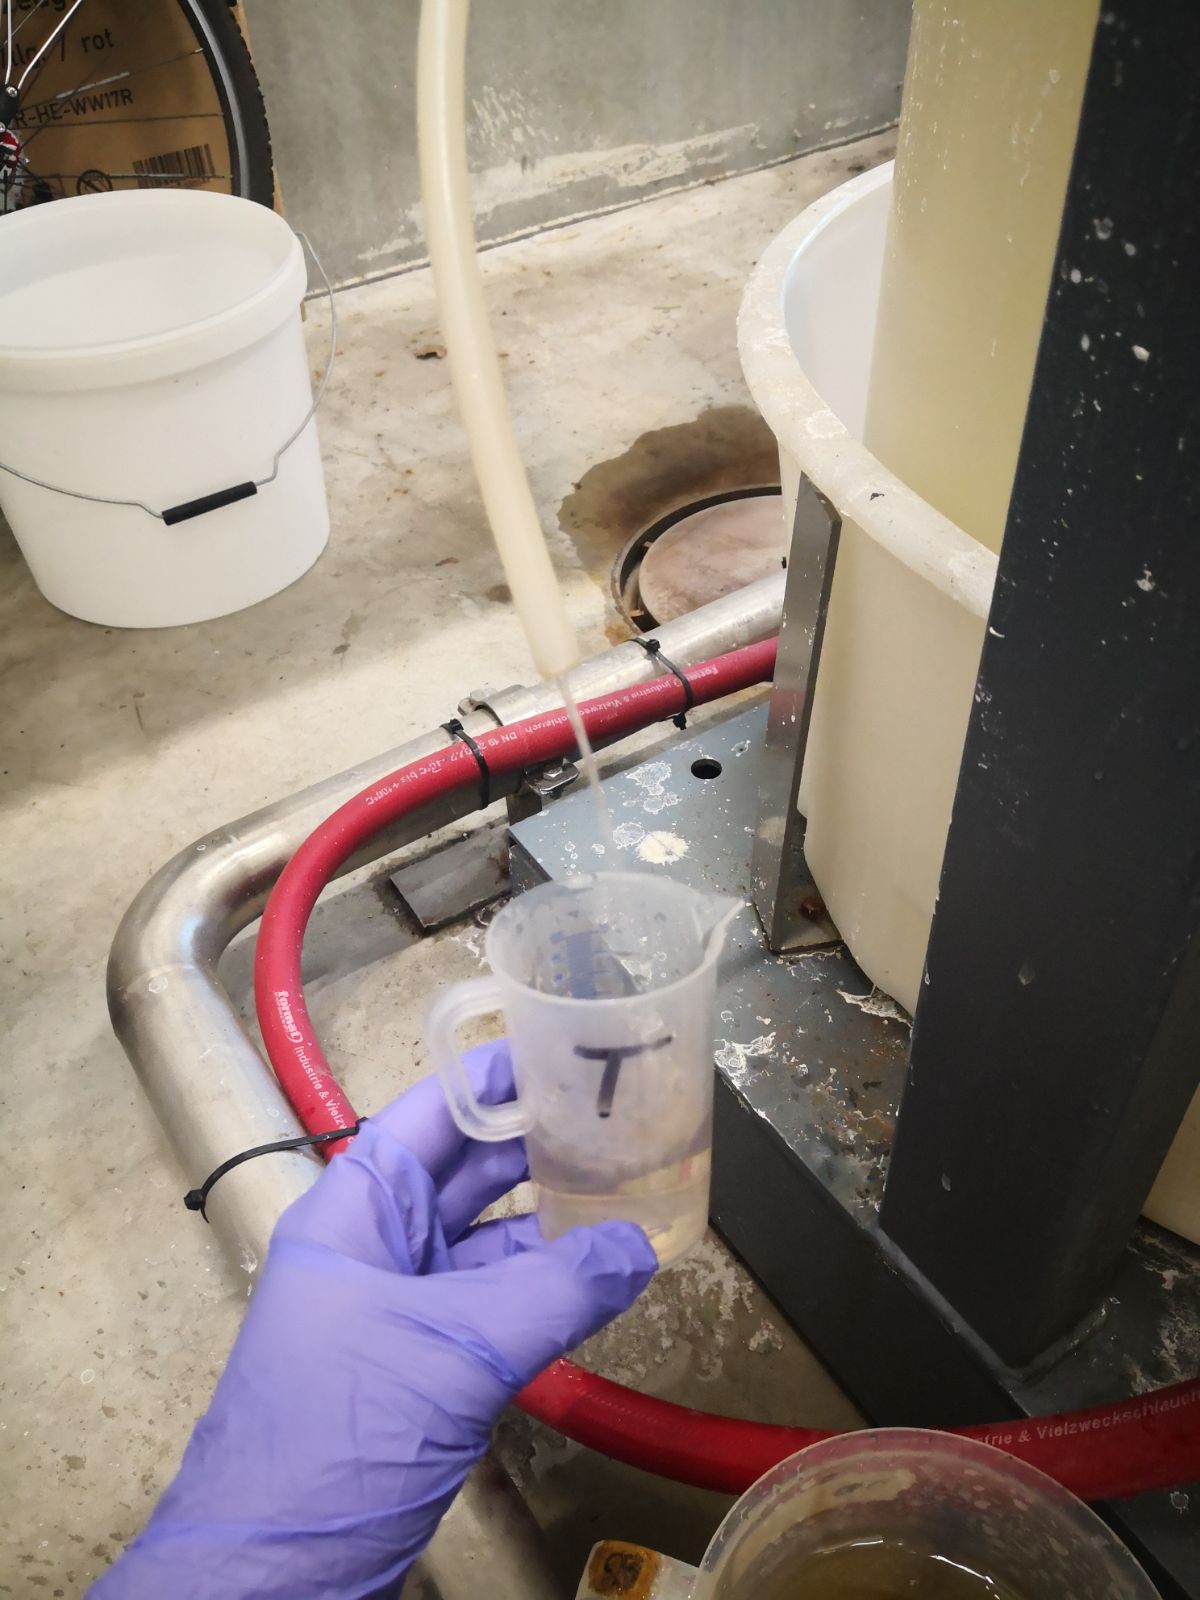
- Fill the T beaker to the marked volume.
- Close the hotwell sample valve before moving to the condensate sample.
Condensate Sample
- Open the condensate sample valve.
- Flush the line until liquid runs steadily. If sampling after the hotwell, flush longer to clear hotwell liquid from the shared sample line.
- Fill the C beaker to the marked volume.
- Close the condensate sample valve.
- Close the main sample valve.
Warning
Close all sample valves when done. Open valves will drain the hotwell or keep refilling it, wasting energy and distorting subsequent readings.
Measurements

Hotwell (T beaker):
| Measurement | Tool | Method |
|---|---|---|
| pH | pH meter | Dip, wait for reading to stabilise |
| Conductivity | Conductivity meter | Dip, wait for reading to stabilise |
| Hardness | Test strip | Dip quickly, shake until colour stabilises, compare to chart on container |
| Sulfite | Test strip | Same as hardness |
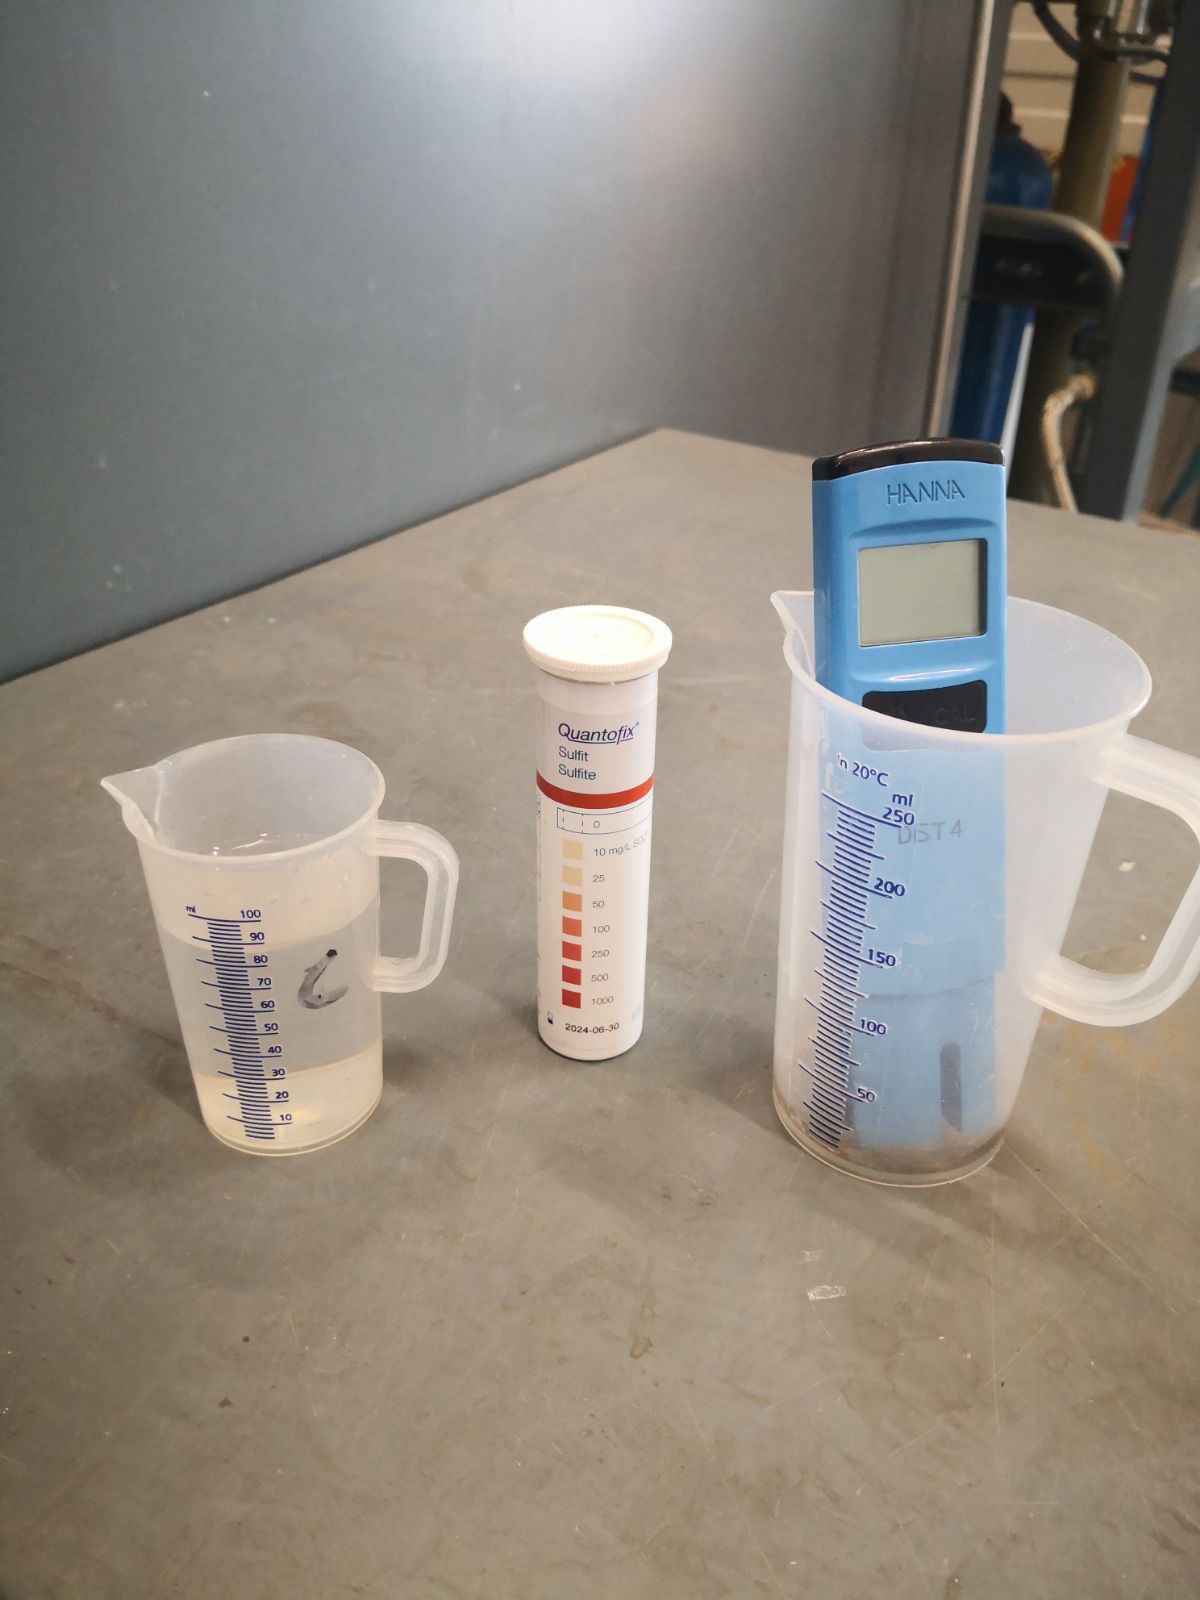
Condensate (C beaker):
| Measurement | Tool | Method |
|---|---|---|
| Conductivity | Conductivity meter | Dip, wait for reading to stabilise |
| Sulfite | Test strip | Dip quickly, shake until colour stabilises |
Chemical tank fill level: Read from the visual marks on the outside of the antioxidant tank. Note this alongside the measurements.
Logging
Record in the Steam Control Sheet:
- Date and who took the measurements
- Process running at the time
- Hotwell: pH, conductivity, hardness, sulfite
- Condensate: conductivity, sulfite
- Chemical tank fill level
Checklists
Monday Startup
- [ ] Steam room inspected — no leaks, no unusual noises
- [ ] Screen woken, power button pressed (step 1)
- [ ] Power button pressed again (step 2)
- [ ] Stop pressed (step 3)
- [ ] Power button pressed again (step 4)
- [ ] Start pressed — startup sequence running
- [ ] Automatic mode activated (Remote button active, not crossed out)
- [ ] Hotwell dump: magnet removed, 1 min drain, magnet replaced
- [ ] Condensate line flushed (10 seconds)
- [ ] Maintenance checks: filter condition, salt level, chemical level
Weekly Water Check
- [ ] Main sample valve opened
- [ ] Hotwell sample flushed until hot, T beaker filled
- [ ] Hotwell sample valve closed before opening condensate valve
- [ ] Condensate sample flushed, C beaker filled
- [ ] All sample valves closed
- [ ] Hotwell: pH, conductivity, hardness, sulfite measured
- [ ] Condensate: conductivity, sulfite measured
- [ ] Chemical tank fill level noted
- [ ] All data logged in Steam Control Sheet with name and running process
Troubleshooting
| Issue | Likely Cause | Action |
|---|---|---|
| Remote button not visible | Startup not yet complete | Wait a few more minutes. Button appears only when startup is fully done. |
| Burner controller — air pressure error | Air pressure fault at burner | See detailed procedure below. |
| Other generator alarm on display | Various | Note the alarm code. Check for leaks or unusual noises first. Do not silence without investigating. Contact brewmaster if unresolved. |
| Low or no flow at sample line | System idle, or valve not fully open | Confirm main valve and relevant sample valve are open. When no steam demand is running, flow will be slow. |
| Sample reads out of spec | Chemistry drift, consumption higher than input | Check salt/chemical top-up status. If consistently out of spec, discuss with brewmaster. |
| Salt or chemical level drops quickly | High consumption during busy weeks | Top up more frequently. Note the rate — if consistently fast, consider increasing routine check frequency. |
| Botec enErrors (F messages) | Unknown — Botec internal | See procedure below. |
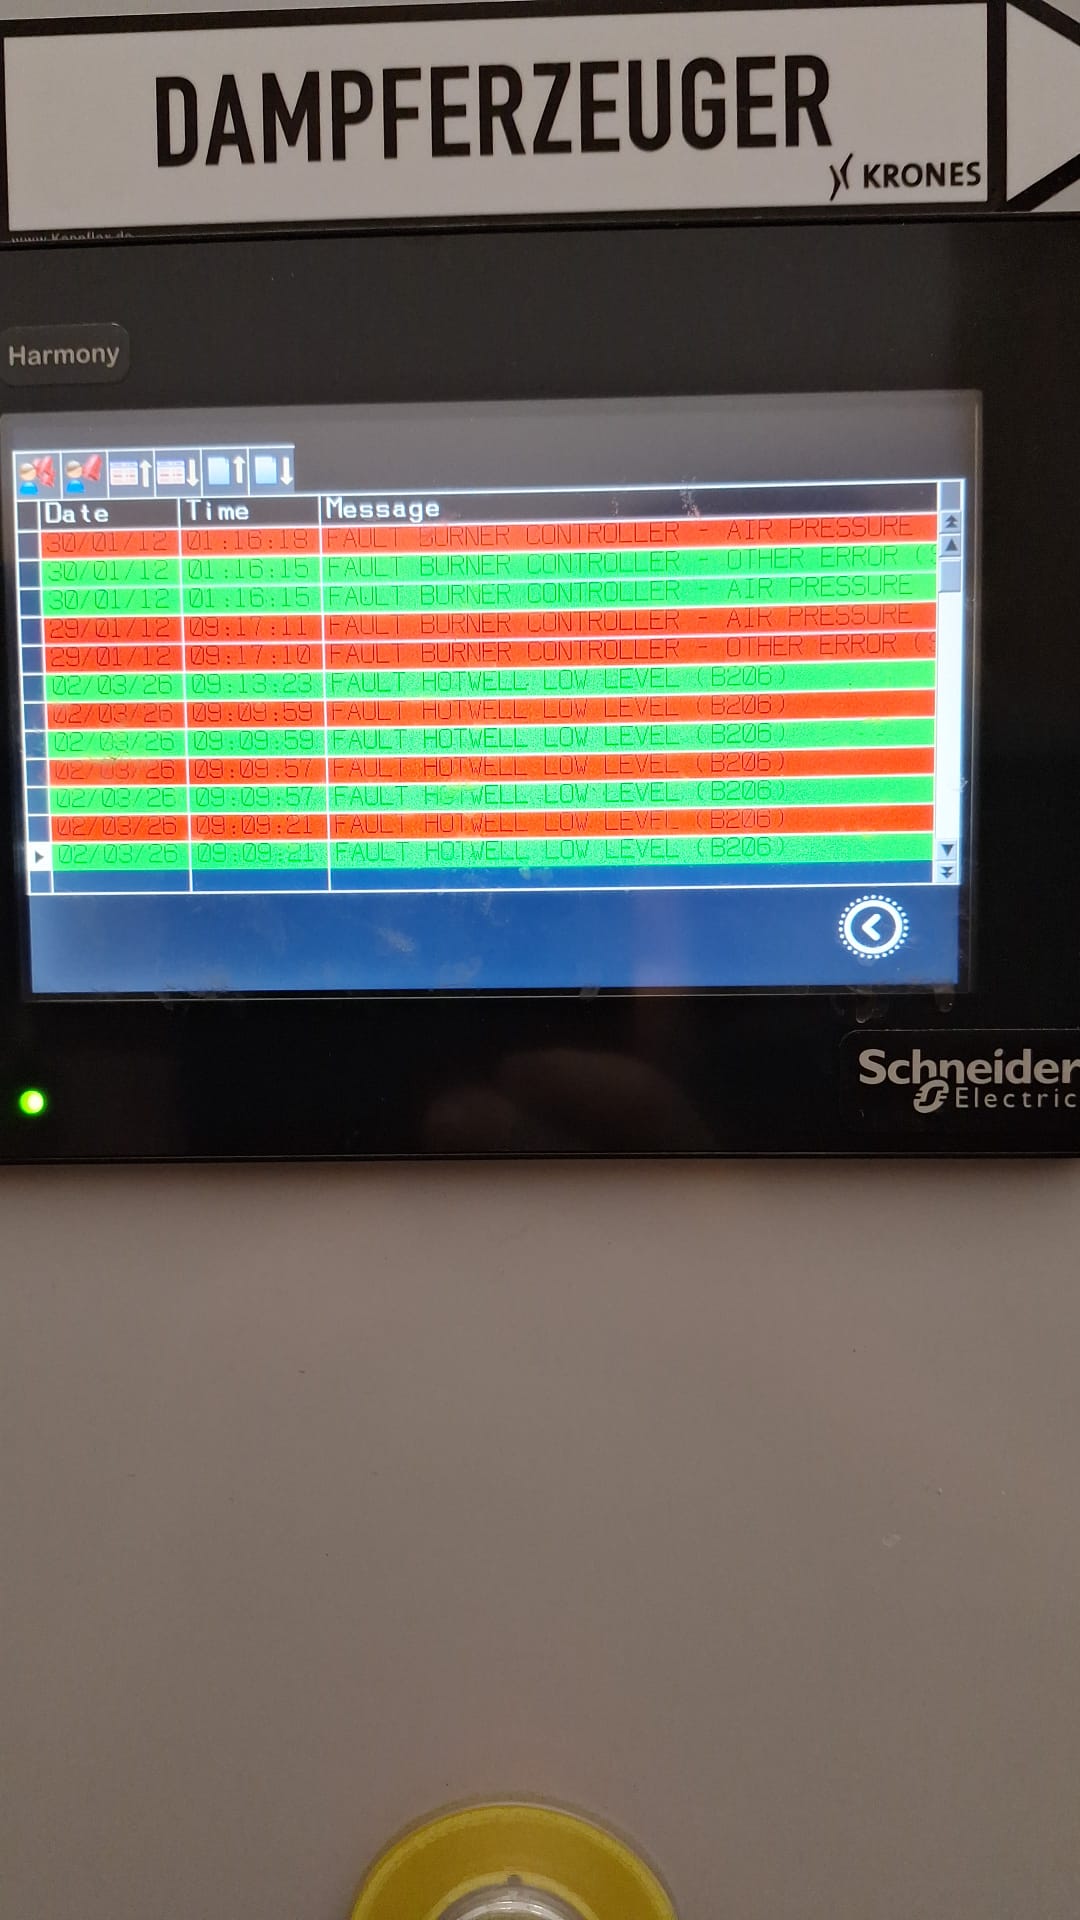
Burner Controller — Air Pressure Error
The generator stops and shows a burner controller / air pressure fault. Two displays need to be reset: the burner controller unit (on top of the generator) and the main Schneider touchscreen.
Step 1 — Reset the burner controller
Go to the burner controller on top of the steam generator. Press or hold the Enter button until the error on the burner display clears.
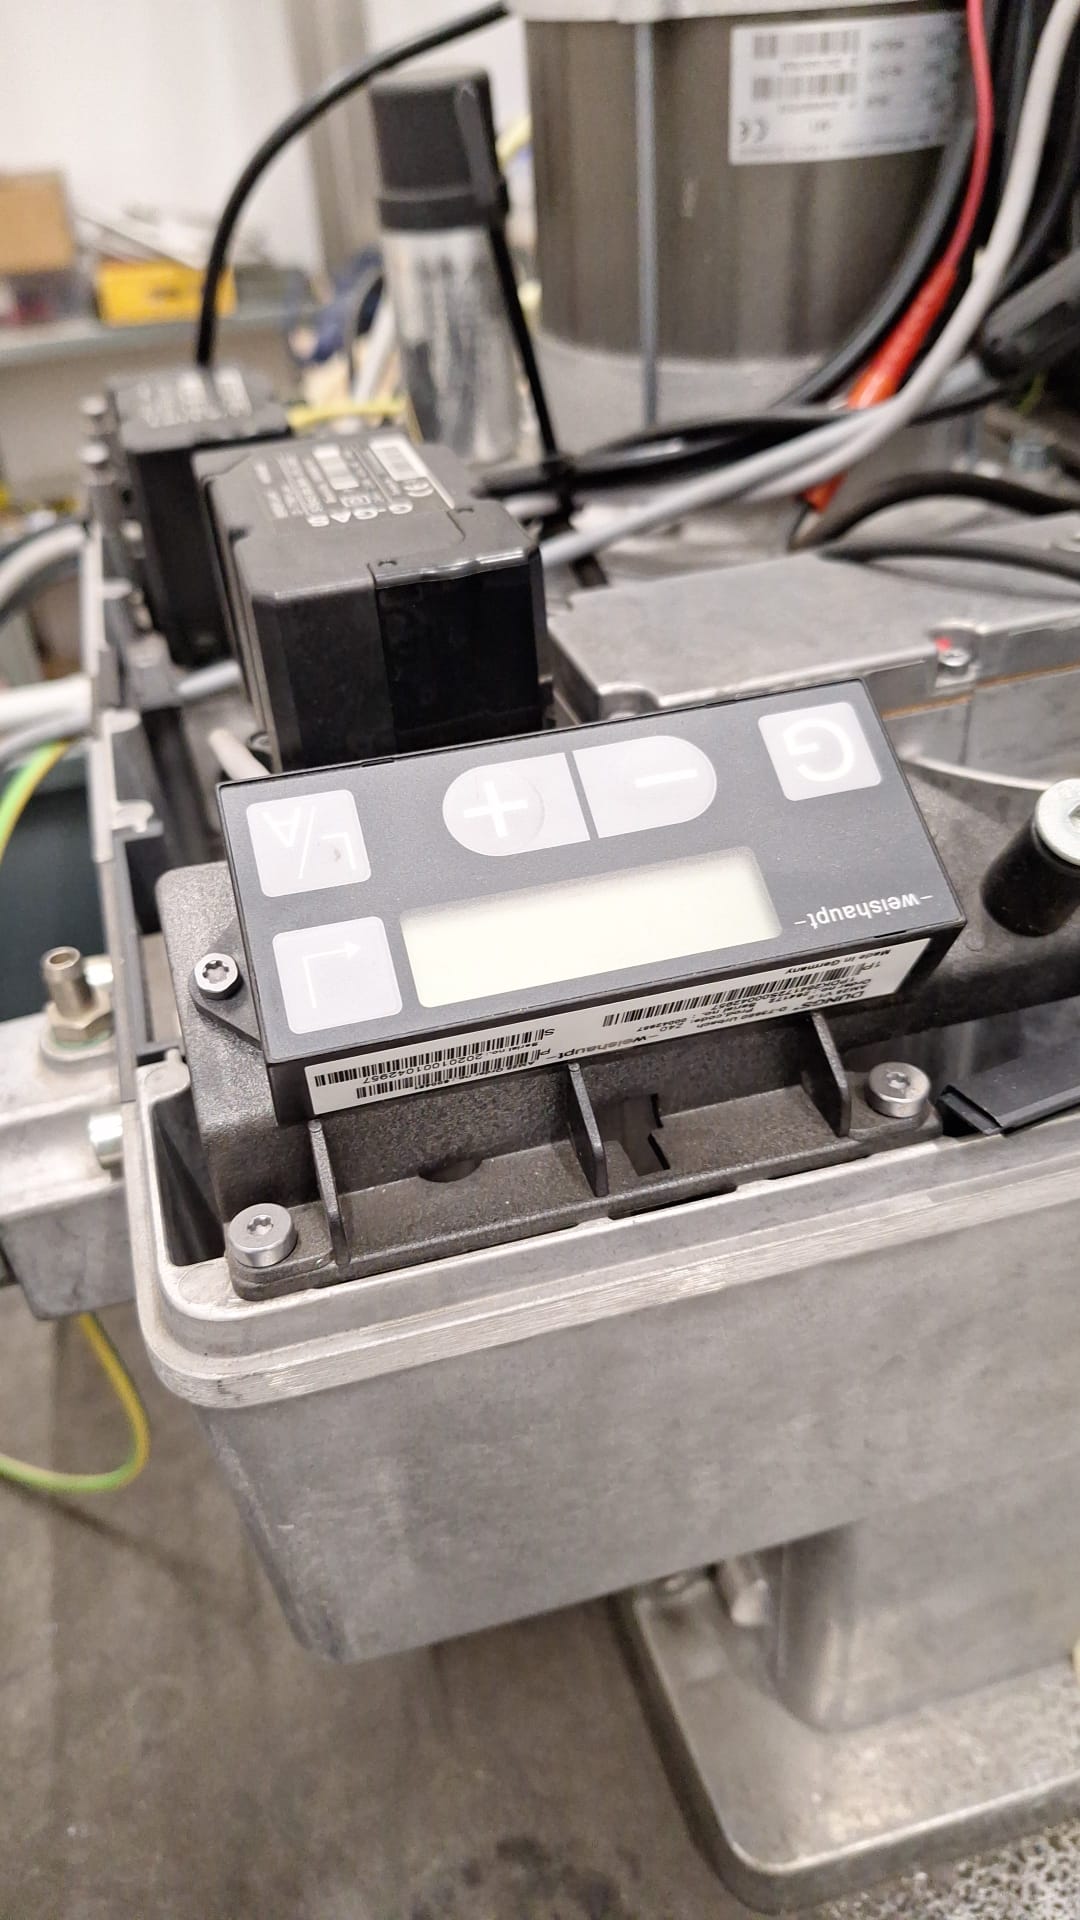
Step 2 — Navigate to the reset screen on the main display
On the Schneider touchscreen you will see a red error indicator at the top of the main screen.
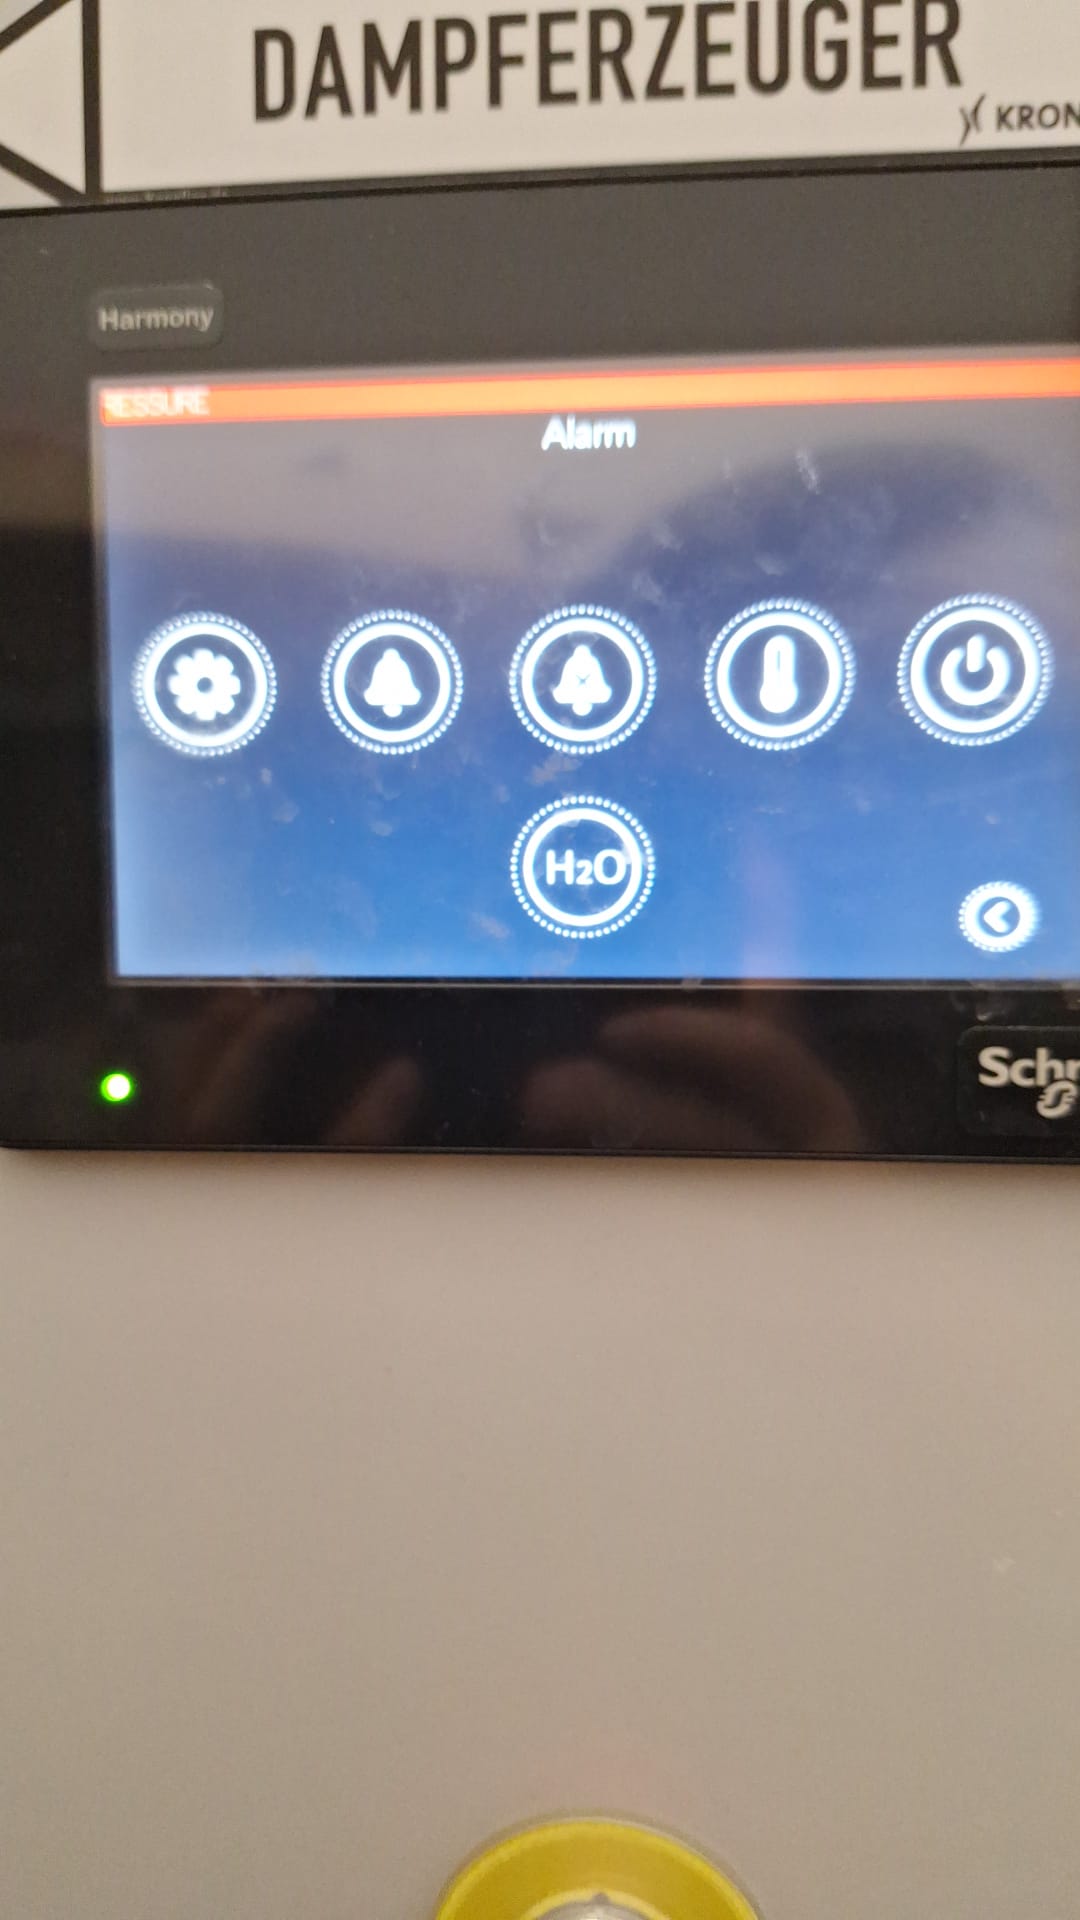
Press the arrow button a few times to navigate through menus. If you see an F message, press and hold the arrow.
Note
You can also view the full error history on the error log screen — useful for understanding what triggered the fault.
Step 3 — Press Reset
Navigate to the alarm/reset screen. Press Reset.
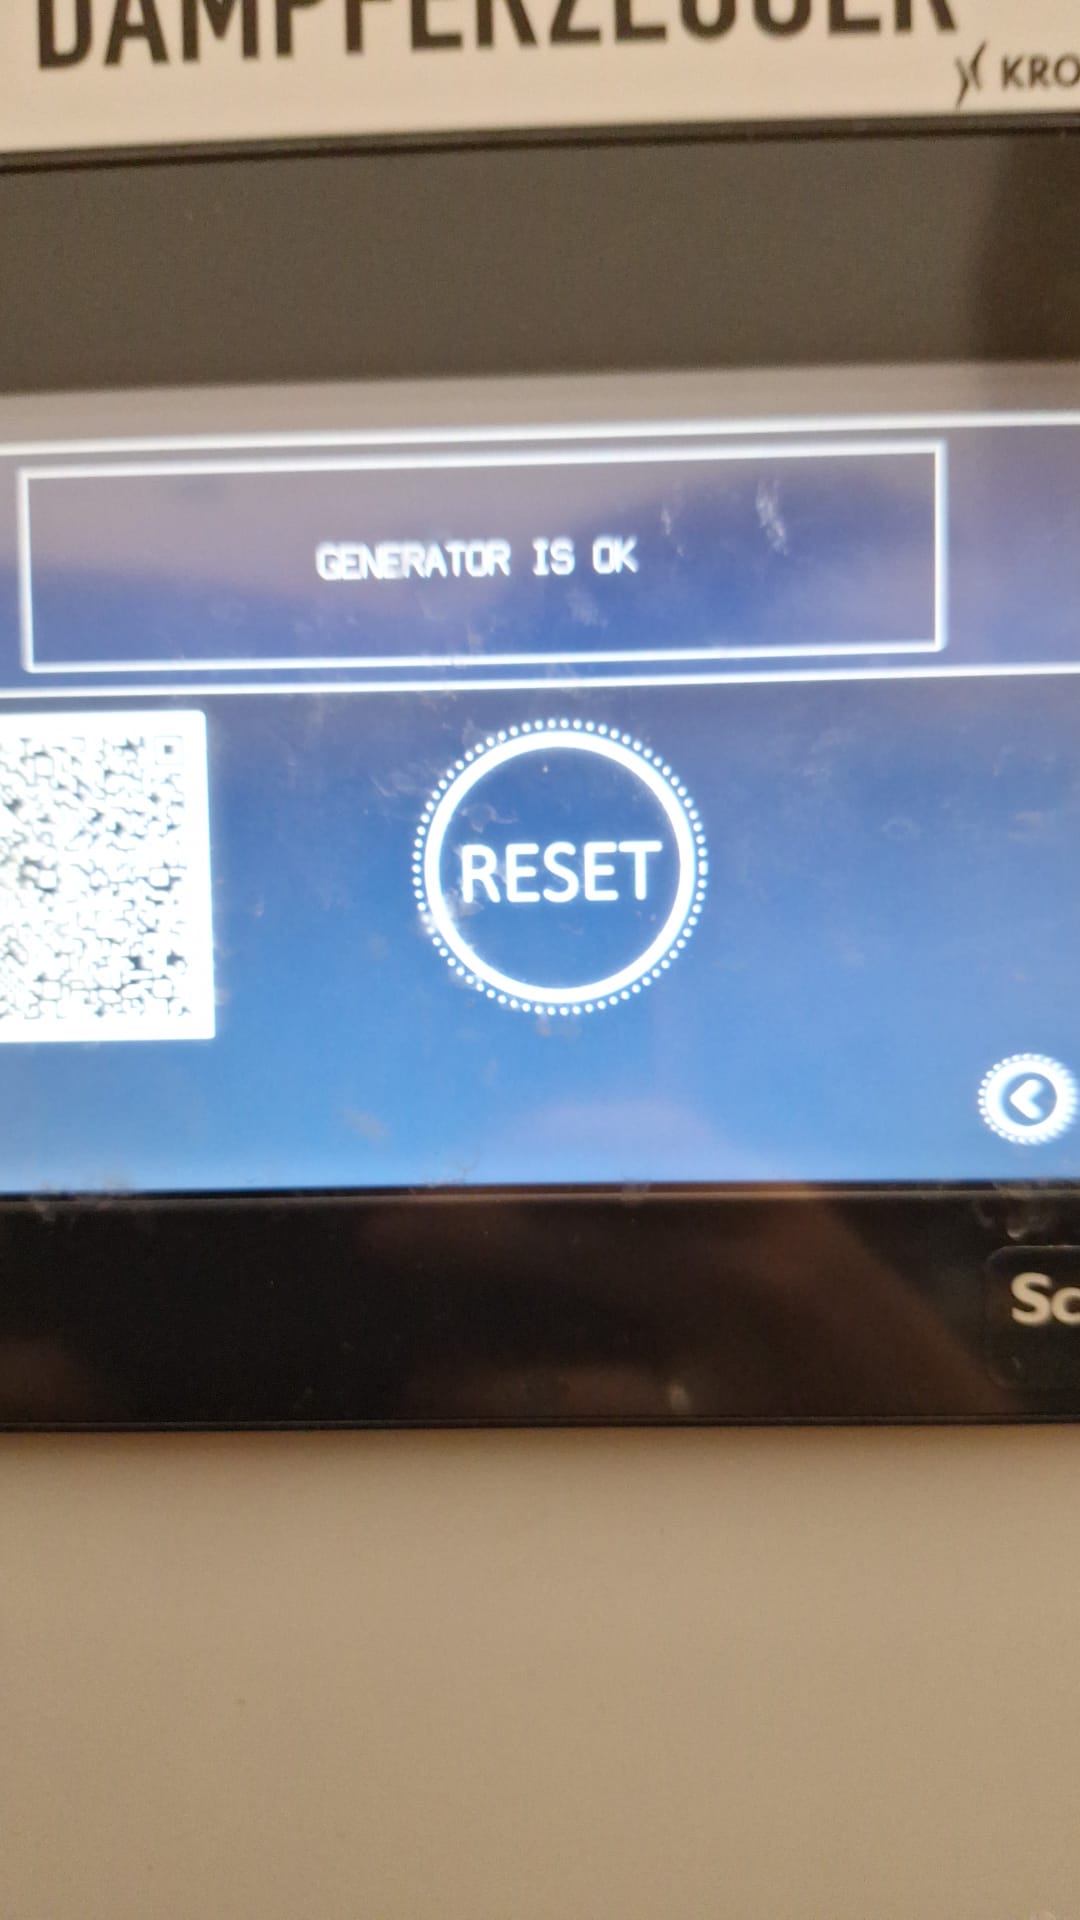
Step 4 — Verify and start
Wait a few seconds. If the error does not reappear, the generator is ready to start. Follow the normal startup procedure (section 2) — right button, then Start.
Open the metal ventilation windows in the steam room as wide as possible.
Note
After an unplanned shutdown (the generator stopped due to a fault, not a manual stop), the generator runs a ~30-minute fill and empty cycle on restart. This does not happen after a normal planned shutdown. Allow time for this cycle to complete before expecting steam to be available.
Botec enErrors (F Program Restart)
enErrors appear in Botec without a predictable cause and prevent Botec from running normally.
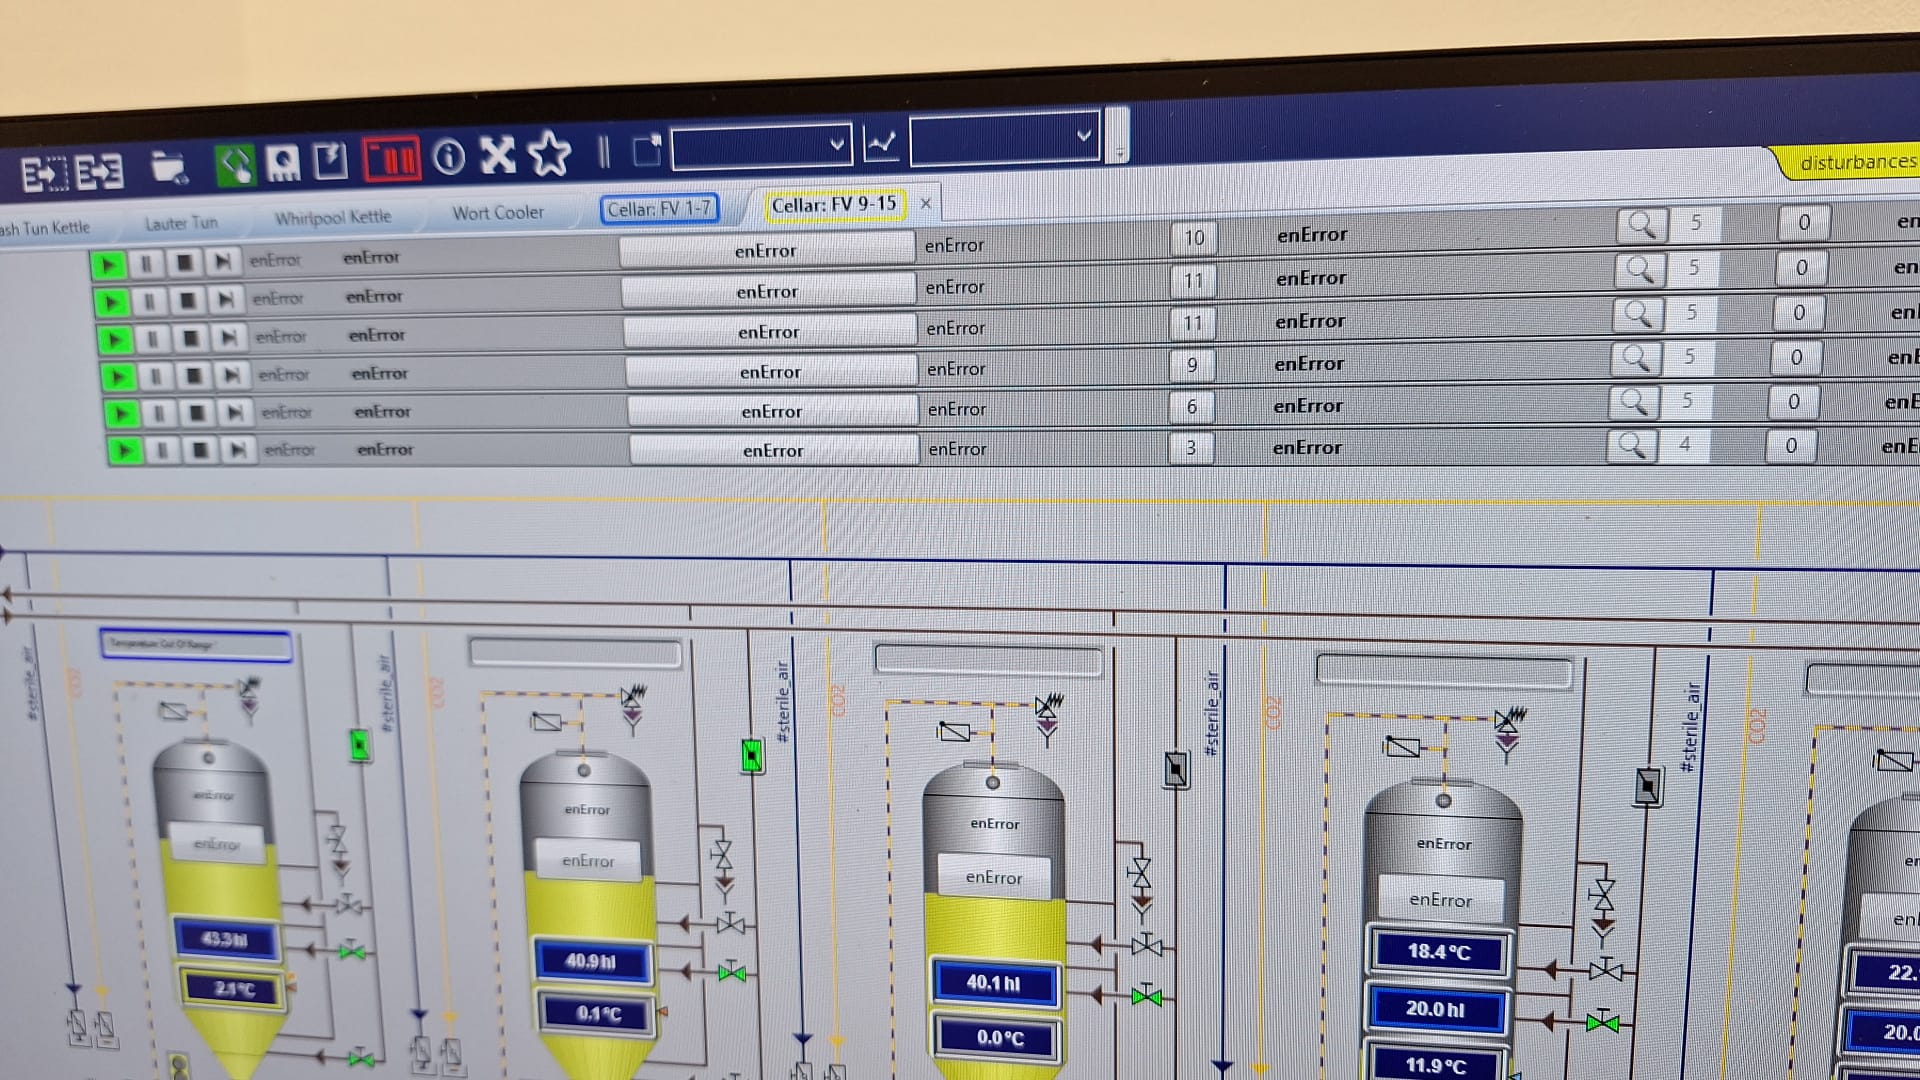
To fix:
- Press Start on the left side of the Botec screen.
- Navigate to F1 Programs.
- Press F1 Program Restart.

Note
Botec enErrors are not specific to the steam generator — they can occur at any time. They are documented here because they may appear during startup after a steam failure. If they occur outside that context, the same fix applies.